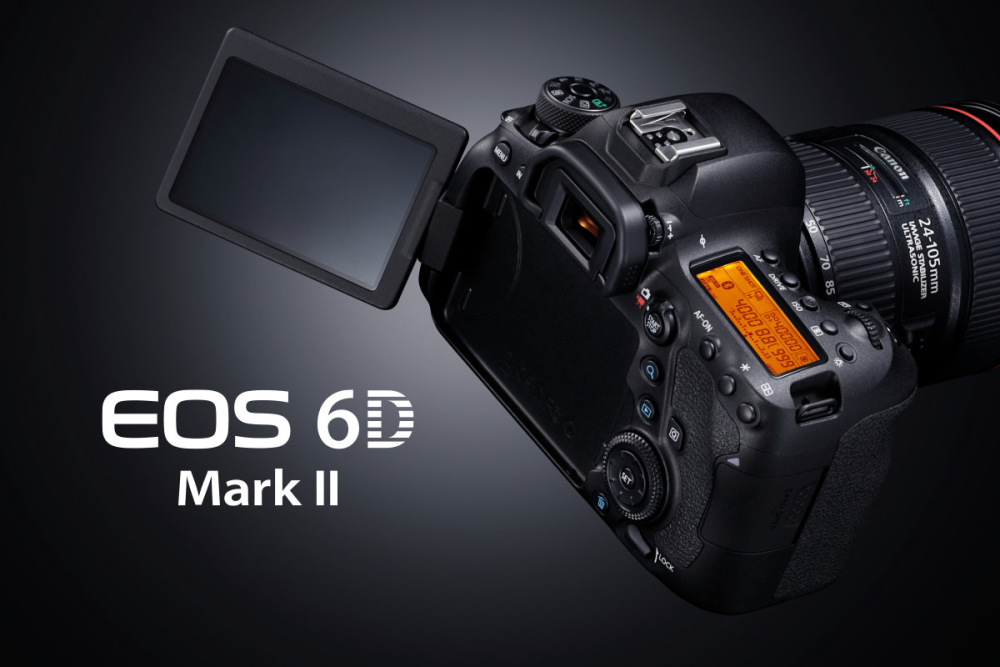
EOS 6D Mark II is the second generation camera in the 6D series by Canon. This full-frame DSLR camera comes with a lot of amazing features which can be used to take almost any kind of image. It is perfect for professional photographers but also works very well for beginners because of its very user-friendly interface.
Canon’s other cameras are also very compatible with beginners, but when you look at Canon 6D Mark 2 vs. 5D Mark 4, the 6D II is newer, cheaper, and a flashier camera from Canon.
If you have just got your hands on Canon 6D Mark II and you are overwhelmed by the idea of using it by looking at all the advanced functions, worry not. We have got you covered.
To get familiar with its functions, you must know what all the buttons on the camera are and how they work. Let’s learn about them one by one.
1. Power Button: The first thing you need to do to use a camera is to power it on with the help of this button. Switch it off when not in use. and if it is not working, make sure the batteries are charged.
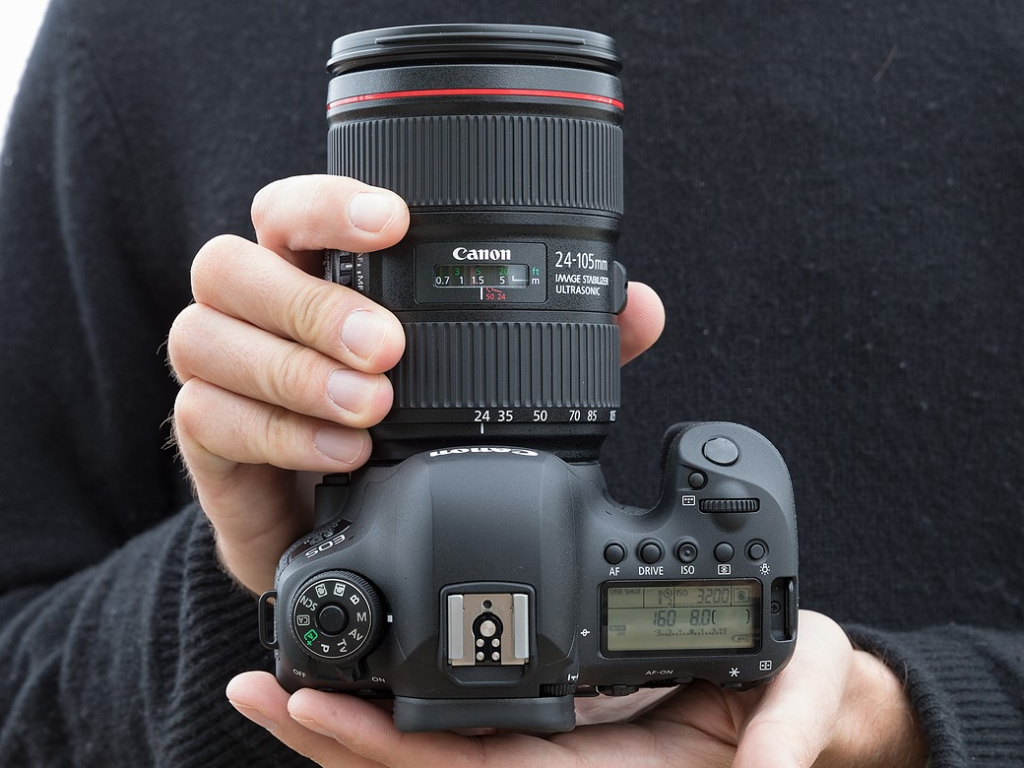
2. Mode Dial: The mode dial on the top plate of the camera comes with a small button in the center, so you need to press it and then turn the dial. This is to prevent the mode change accidentally. The dial allows you to switch between automatic and manual modes.
3. Focus Selection Button: This button allows you to change the currently selected focus area. Each time you press the button, the focus area will switch, and you can set it to whatever you want. This is the most definite way to set your camera’s focus.
4. Function Buttons: There are 5 function buttons to adjust the AF, Drive Modes, ISO sensitivity, metering, and a last light button to illuminate the screen.
5. LCD Monitor: You can check your camera settings by taking a quick look here while using the function buttons. All the adjustments you made to your camera setting will be visible here.
6. Shutter Button: On top, there is a main shutter button, and this button has a dual function. When you half-press it, it will autofocus, and when you fully press it, it will shoot.
7. AF On Button: This is an alternative to focusing on the shutter button; photographers call it back button focusing.
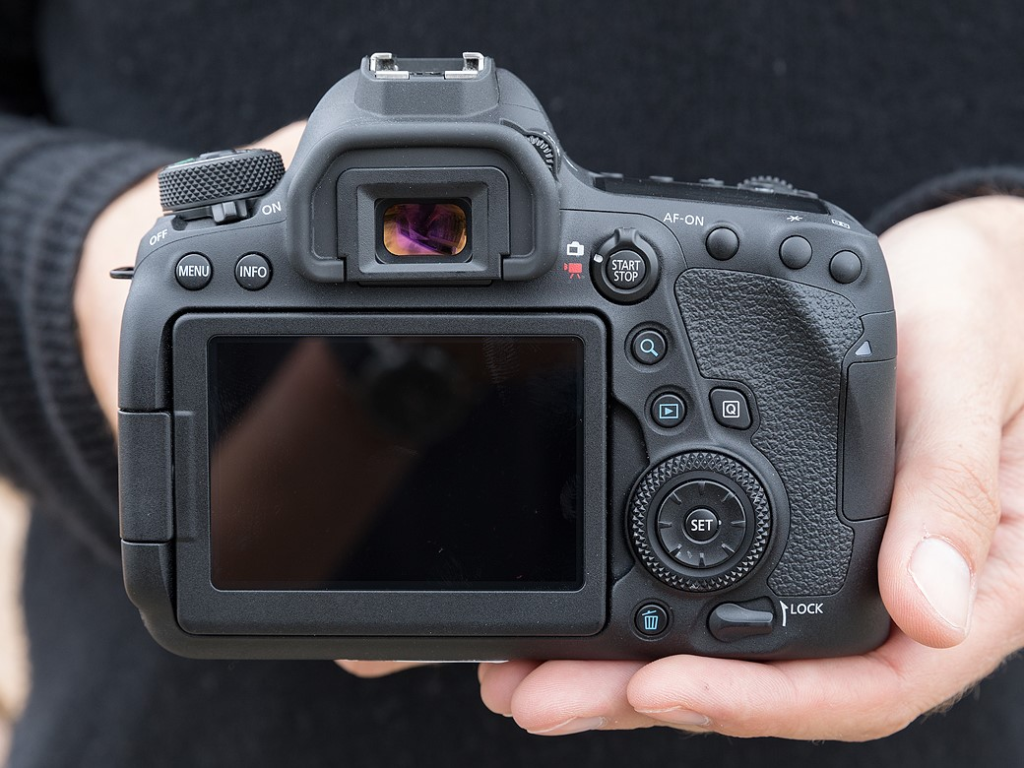
8. Menu Button: This will give you detailed access to the camera settings and functions. Many other buttons are used as a shortcut to select a particular menu section, but this will show you an extended menu that can be navigated with a multi-controller on the right.
9. Info Button: Next to the menu button is the info button, which will give you facts about how much battery you have left, what time it is, and how much space is left in your card. Press it again to make it disappear.
10. Live View and Movie Control: You can switch the live mode on by pressing the central button, and by turning it, you can turn it into movie mode. When in movie mode, use the central button to start and stop the movie.
11. Multi-controller: This button will help you navigate through the menu and also set some of the features. The dial works as four side buttons to go left, right, up, and down.
12. Quick Control Dial: This often duplicates the functionality of a multi-controller, but the set button will allow you to confirm a specific function after navigating through the menu.
13. Lock button: After you are done with navigating the menu and setting the desired functions, use this button to lock the quick control dial to prevent accidental changes in settings while using the camera.
14. Q Button: Many underestimate the use of this button. Using this button will open a quick menu on your screen of major shooting settings, you can navigate and set them with the help of a control dial.
15. Play Button: The play button will let you preview the pictures and videos you took on the camera. You can also use this button to bring back the picture to full screen after zooming in.
16. Zoom Button: The zoom button will let you zoom into the picture displayed on the screen. Press this button and then use the top dial to zoom further in. The zoom button will also work during live mode and movie shooting.
17. Delete Button: Use this button to delete the unnecessary movies or shots in your camera. Press it and then use the set button to confirm.
18. Exposure lock(*) Button: This button locks in the exposure. When you press it once, it will lock the exposure and will also indicate it in the finder with an asterisk mark. Press it again to unlock the set exposure.
19. Area Mode Button: Just beside the exposure lock button is the area mode button, which lets you select which of the 9 AF sensors you want to use or if you want to automate their usage.
These are the various controls you get on the top plate and at the rear of the Canon 6D Mark II
Conclusion
The best way to use your Canon 6D Camera properly is to try each function out and see how they work. It is not always necessary to adjust or use all of them to take good pictures. You can use basic functions at the beginning to get familiar with the camera and then start experimenting with its different features.
Photography is an art that you can only excel with experience. Do not get overwhelmed with all these advanced features in Canon 6D Mark Il; each person uses its camera differently, so learn it while you keep using it!


Leave a Reply