The Sony A7III is a great steal for its price, but is it easy to set up? Spoiler alert- It requires patience to set up the Sony A7III for the first time, as it is loaded with features. But once you have learned the basics of this camera, it becomes easier to operate, and eventually, you’ll explore more of its functionalities.
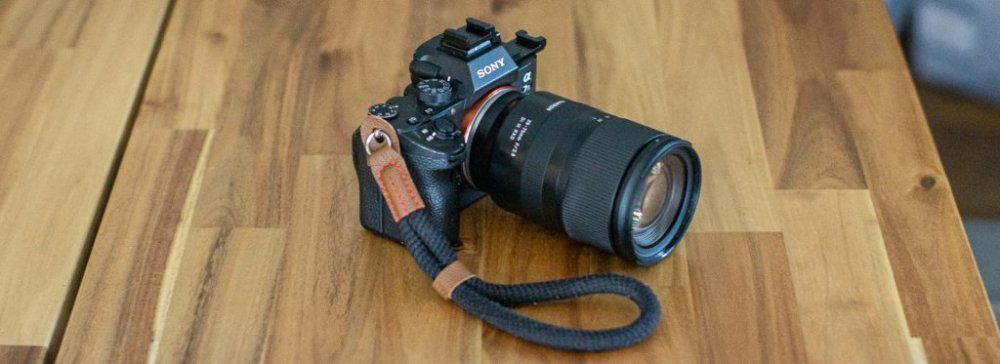
Released in April 2018, the Sony A7III camera has revolutionized the mirrorless full-frame camera world.
A brief about the key features of the Sony A7III camera – it comes with a 24-megapixel full-frame BSI CMOS Sensor enabling amazing performance in low-light conditions, fast and hybrid autofocus, touchscreen LCD, 4K video up to 30 frames/second, 1080p vide up to 60 frames/second and its small, portable size which makes it more handy.
Here is a step-by-step guide for setting up the Sony A7III for the first time.
The Battery
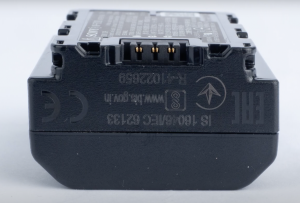
The Sony A7III camera uses a Sony NPFZ100 Z-series Rechargeable Battery Pack having a capacity of 2280 mAh. It takes about 150 minutes to recharge with a Sony BC-QZI charger and about 285 minutes via a USB.
Instructions to Insert and Charge the Battery
1. Open the battery slot at the bottom of the camera.
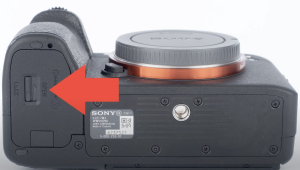
2. Insert the battery correctly by matching the shape of the battery with the shape of the slot.

3. Once you have inserted the battery correctly, you’ll hear a click sound, suggesting proper insertion. Shut the battery slot. On the side of the camera, open the rubber slot on the bottom, and you’ll see some ports for plugging in the charger.

4. Plug in the charger in the lower port. Give it some time to recharge fully.
The Lens
Instructions to Insert the Lens
1. At the bottom left side of the lens, a button is there for releasing the lens cover. Press the button and twist the cover to the left to remove it.
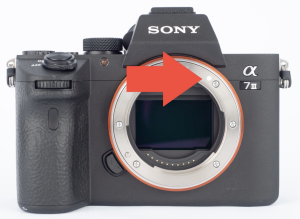
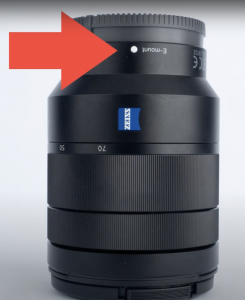
2. Remove the back cover from the lens as well. Align the white dot on the back of the lens with the white dot on the front of the camera.

3. Twist the lens to the right. The lens will be locked in place. Remove the lens cap after the lens is locked in place.
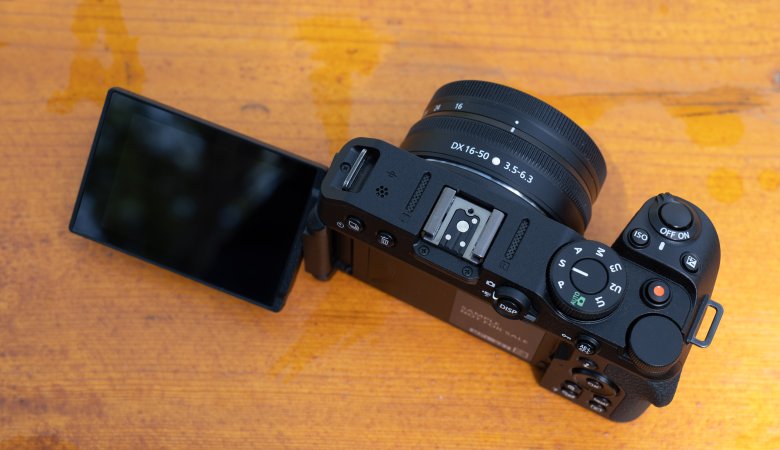
Dials and Buttons
The following is a brief about all the dials, buttons, and wheels and their functionalities on the Sony A7III.
- Custom 3 Button: This button provides the user quick access to change the camera’s focus modes. The focus modes available are AF-S, AF-A, AF-C, DMF, and MF.
- Menu Button: This is a dedicated button for accessing the main menu for various settings.
- Movie Record Button: As the name suggests, the function of this button is to start recording videos.
- AF-ON Button: AF stands for Autofocus. Primarily, this button is there for autofocusing, but it can be used for other features, such as back-button focusing.
- AEL Button: AEL stands for Auto Exposure Lock. As the name suggests, the function of this button is to lock the exposure for consistent exposure throughout photography while it is still locked.
- AF Joy Stick: This joystick lets the user control the camera’s autofocus points without navigating through the menu, which used to be tedious.
- Function Button: This button enables the user to access a variety of shortcuts. The function menu is customizable.
- Multifunctional Selector Wheel: The multifunctional selector wheel or the control wheel enables the user to navigate through the options on each menu. The user can go right, left, up, and down by pressing on the respective sides of the wheel. The center of the wheel is used to ‘Enter’ a particular command.
- Playback Button: This button is used to preview/ play back images on the LCD screen on the camera.
- C4/Trash Button: When in playback mode, this button enables the user to delete pictures. This is another custom button (C4)when playback mode is not operating.
Dials and Buttons on the Top
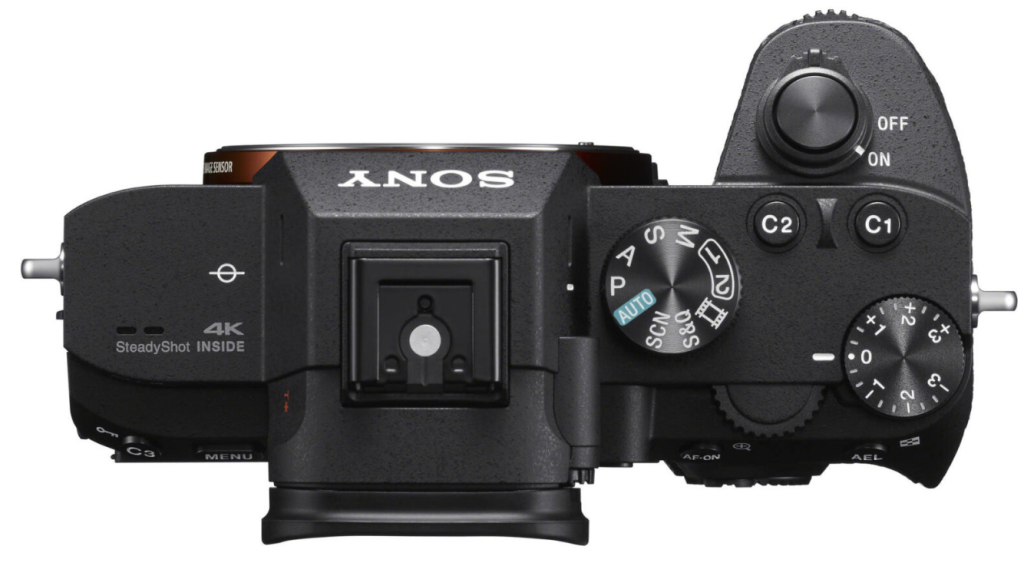
Camera Mode Dial
This dial enables the user to operate different modes on the camera. These modes are mentioned as initials or short forms on the dial.
- Auto on the dial stands for Full Auto
- P on the dial stands for Program
- A on the dial stands for Aperture Priority
- S on the dial stands for Shutter Priority
- M on the dial stands for Manual
- 1 and 2 are User Set
- SCN on the dial stands for Scene
- S & Q on the dial stands for Slow and Quick
Exposure Compensation Dial
The user can adjust the exposure using this dial in conjunction with the modes available on the camera mode dial, such as Program, Aperture Priority, and Shutter Priority.
Custom 1 and Custom 2 Buttons
While the camera is on the default setting, C1 adjusts the white balance and C2 for the focus area. These custom buttons can be customized according to the user’s preference.
Some Basic Settings to Get Started
You can turn on your camera after you have placed the battery, charged the battery, and set the lens correctly.
- Language Setting: The first thing to pop up when you switch on the camera is options for language settings. Set the language according to your preference using the multifunctional selector wheel/ control wheel to navigate through the options. Upon arriving at your desired option for language, press the center of the control wheel and select “Enter” on your screen.
- Area Setting: Select your time zone/ area after skimming through all available options. Use the control wheel to navigate through the options. Press the center of the multifunctional selector wheel and select “Enter” on your screen.
- Date/ Time Setting: Using the multifunctional selector wheel, set the date and the time correctly. This concludes the basic setup of the Sony A7III Camera.
Conclusion
Looking at so many buttons, dials, and slots, it might initially seem confusing and overwhelming. To summarize the procedure for setting up the Sony A7III camera, you’ll need to insert the battery in the camera and give it time to recharge.
Next, insert the lens correctly. Turn on the camera and set the language, date, area, and time.
Upon successfully setting up the Sony A7III camera, you can explore more of its functionalities by adjusting settings using the buttons and dials provided on the top and rear sides of the camera. Don’t beat yourself up if you don’t get the hang of it initially.
As mentioned before, it takes patience to learn about the advanced settings of the Sony A7III camera.
Leave a Reply