Are you looking to enhance your photography skills by incorporating framing as a technique? Or feels like exploring the unexplored in the world of photography? Then, you have come to the right place.
Photography is a skill that has been around for centuries. But to say that one has become the master of it would be a far-fetched lie. As the world around us is volatile and ever-changing, how we capture the world also needs to be constantly updated. Framing in photography is a technique that instantly gives your shots a makeover and gives them a different perspective. Using frames, you can emphasize the subject even more, making the picture look aesthetic and whatnot!
In this blog, I will guide you through everything related to framing and how you can use it in your next shoot and have excellent results.
What is Framing in Photography?
Framing in photography is the skill of playing with frames to intensify the focus on the main subject. It helps by dulling out other visual elements of the photo and leading the focus of the viewer back to the main subject.
It is one of the unique skills that separates amateurs from professionals. Always keeping the frame in mind while capturing a photo is not an easy thing to remember for beginners. However, with practice, it tends to become second nature for every seasoned photographer.
Always remember that better framing is not the end but a means to achieve a better snapshot. The objective remains the accurate depiction of the subject. Only so much good framing can do if the main subject is inappropriate.
The Rule of Thirds
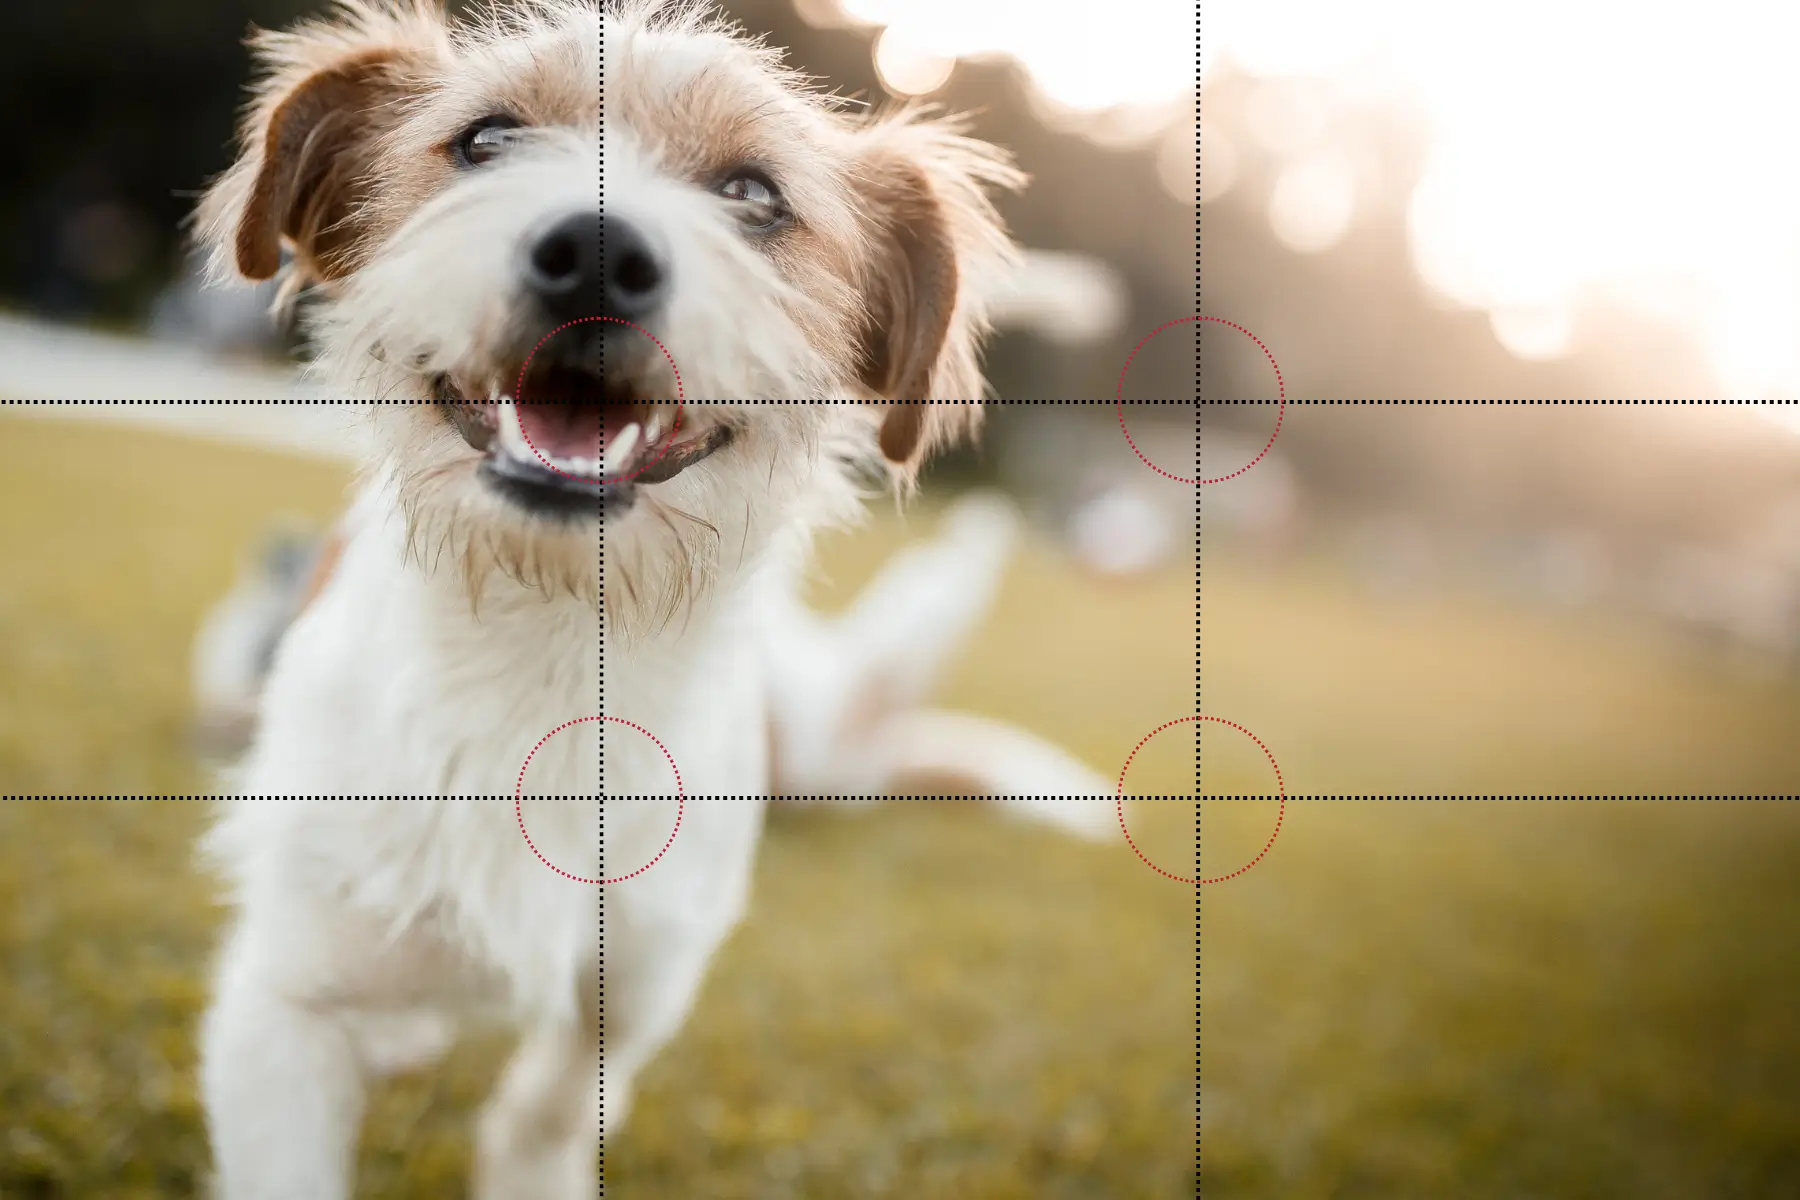
Framing and the Rule of Thirds go together to create visually aesthetic pictures. This rule states that the main subject should be put on the off-centre of the frame, leaving 2/3rd of the frame empty. This helps emphasize the focus on the 1/3rd area where the main subject lies. Incorporating this rule with accurate framing, one can easily elevate the aesthetic sense of their photos in no time!
Let’s understand how framing in photography actually works with some tips and examples to make you grasp this essential skill quickly.
Few Ideas and Examples to Elevate Your Framing Skills in Photography
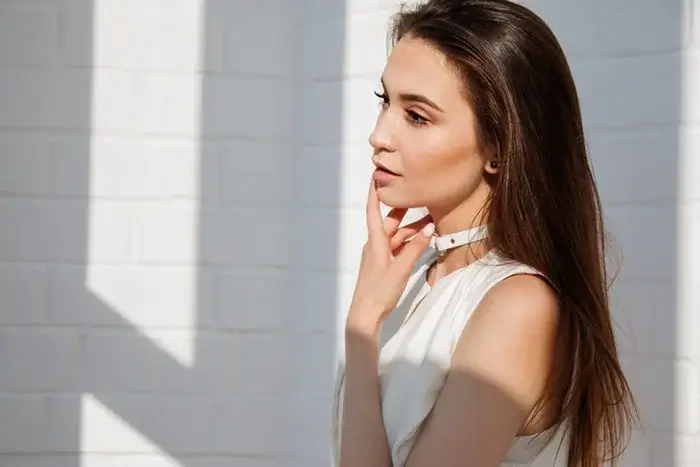
1. Using People
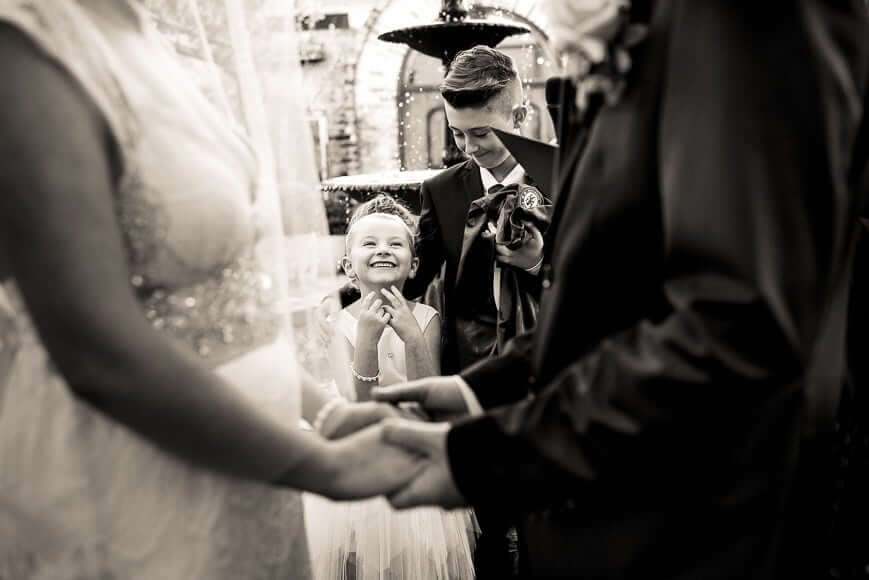
People can act as frames for your main subject. For example, in the above photo, you can see how the couple in the front is intentionally hidden to emphasize the focus on the main subject, i.e., kids in the background.
Using people as frames is extremely common when emotions are supposed to be captured. For instance, weddings, birthday parties, and anniversaries are some cases in which you can use people as frames to elevate the visual appeal.
As you can see in the above picture, the girl’s emotion is beautifully captured by portraying couples in front as frames. Also, the color balance is well taken care of, as tones of black are balanced with lighter white shades
2. Using Architectural Pictures
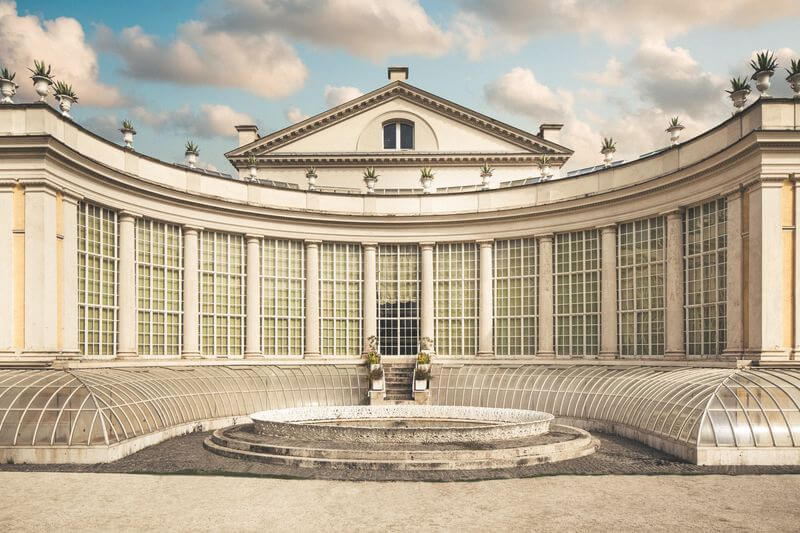
Architectural wonders can be a powerhouse of aesthetic frames. The big bouldered entrances, vintage windows, and the surrounding nature present themselves as some perfect examples of the frames. In addition, most architectures get abundant sunlight, which leads to the creation of shadows as well, helping in naturally balancing the color of the photographs. Apart from that, symmetry in a frame is most commonly found in old architectural buildings.
All these factors combined make architecture a perfect place to start your framing journey. By playing with the angle of the photographs, different frames of varied depths can be created to highlight the subject further.
3. Using Light and Shadow
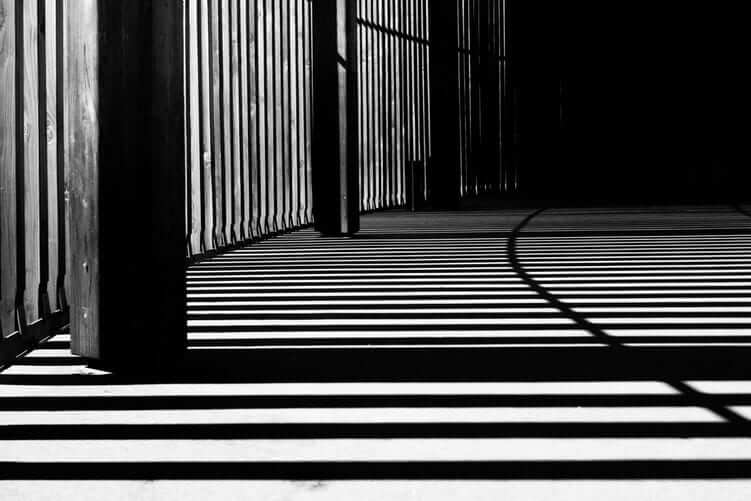
Light and darkness have existed since eternity, and it holds even in photography. So, to make the shot stand out, you can keep the main subject in lighter areas of the frame and keep the other elements of the photo in darkness for enhanced focus. For instance, in the above image, sunlight filtering through the bars of the jail naturally creates a color balance and a ready-to-use frame.
Always remember that the human eye is much more dynamic and receptive to colors than any camera lens. So what might look like a shadow to you can appear highly dark through the lens.
4. Using Sense of Depth

A sense of depth in the frame is created where there are three elements to a structure – a foreground, a middle ground, and the background. This bifurcation helps because the viewer has to put minimal effort into understanding the primary intention of the picture.
Another way to achieve depth in photography is through portrait photography. In portraits, the quality in the sense of depth is directly proportional to your camera’s aperture. If the aperture is less, the sense of depth will be more defined, making the image appear in 3D instead of 2D. In addition, photos clicked with bokeh mode or portrait photography have an inherent sense of depth because it blurs out the other elements just enough to highlight the main subject.
5. Using Doors and Windows

Much like using architecture as frames, you can also experiment with doors and windows in your house. The good thing about them is that they are easy to find and straightforward to capture shots using them. Even beginners can use them easily since it gives the appearance of frame in frames (doors and windows are other structures), and not many adjustments are needed. In addition, you can easily follow the Rule of Third, even in this type of framing, to easily capture aesthetic shots.
For instance, door frames are optimal for full-body shots. And window frames are perfect for creating the visual for someone sneakingly looking inside (depending on where you are standing).
In the above shot, a big window is used as a frame from which they are looking out, giving the picture much-needed visual appeal. Even though its not correctly aligned, it still looks aesthetic because of the color balance and other muted shades.
6. Using Minimalistic Features
Minimalist photography owes its origins to late 20th-century artists who were inspired by geometric patterns. The foundational principle in minimalistic photography is assuming that less is more.
Even though the main subject in every shot is the center of attention, in minimalist photography main subject matters even more since the whole attention will be on it.
In this above shot, the main subject successfully captures all the viewer’s attention, and the background only aids in enhancing the image without taking too much attention.
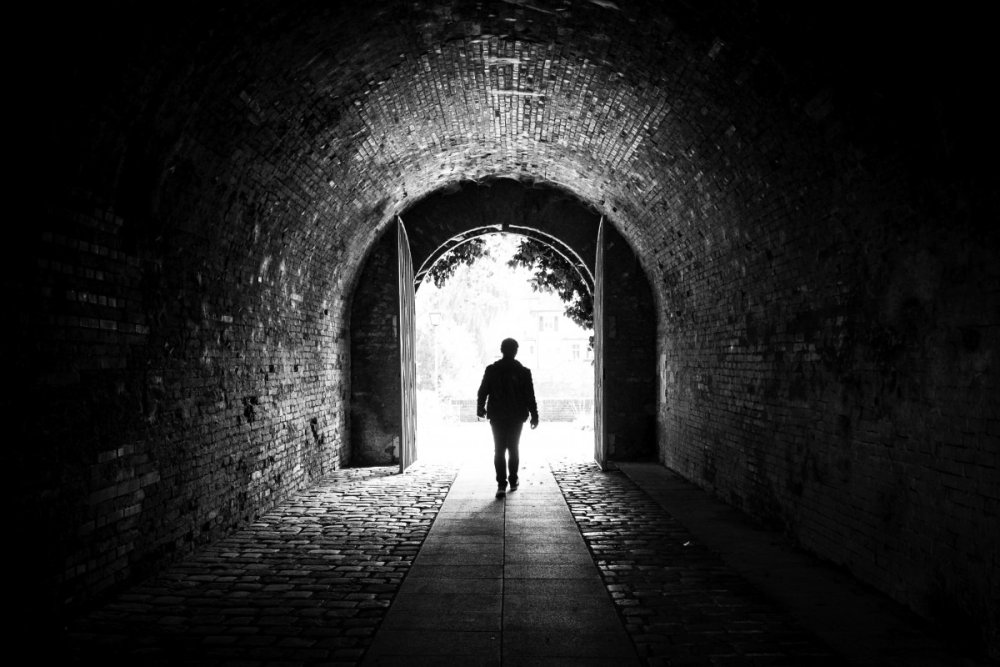
7. Using Tunnels
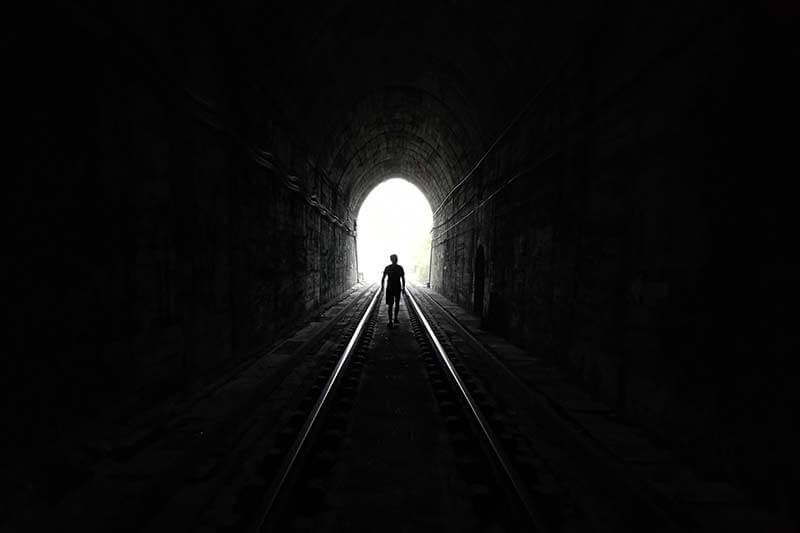
Using tunnels for framing in photography is a sure-shot way of looking at the scene through the photographer’s eyes. It instantly grips the viewer through its aesthetic symmetry and gives a sense of depth to the shot.
Tunnels as a frame can also also be used to maintain the color balance. For instance, a long tunnel with light in the entrance in front of you and dark from where you’re capturing will automatically make the picture balanced.
The above picture accurately showcases the depth in the frame, the optimum color balance, and formal symmetry in one single frame. What’s astonishing is even though elements of the picture other than the main subject are considerably more, the attention still goes to the boy walking the tunnel.
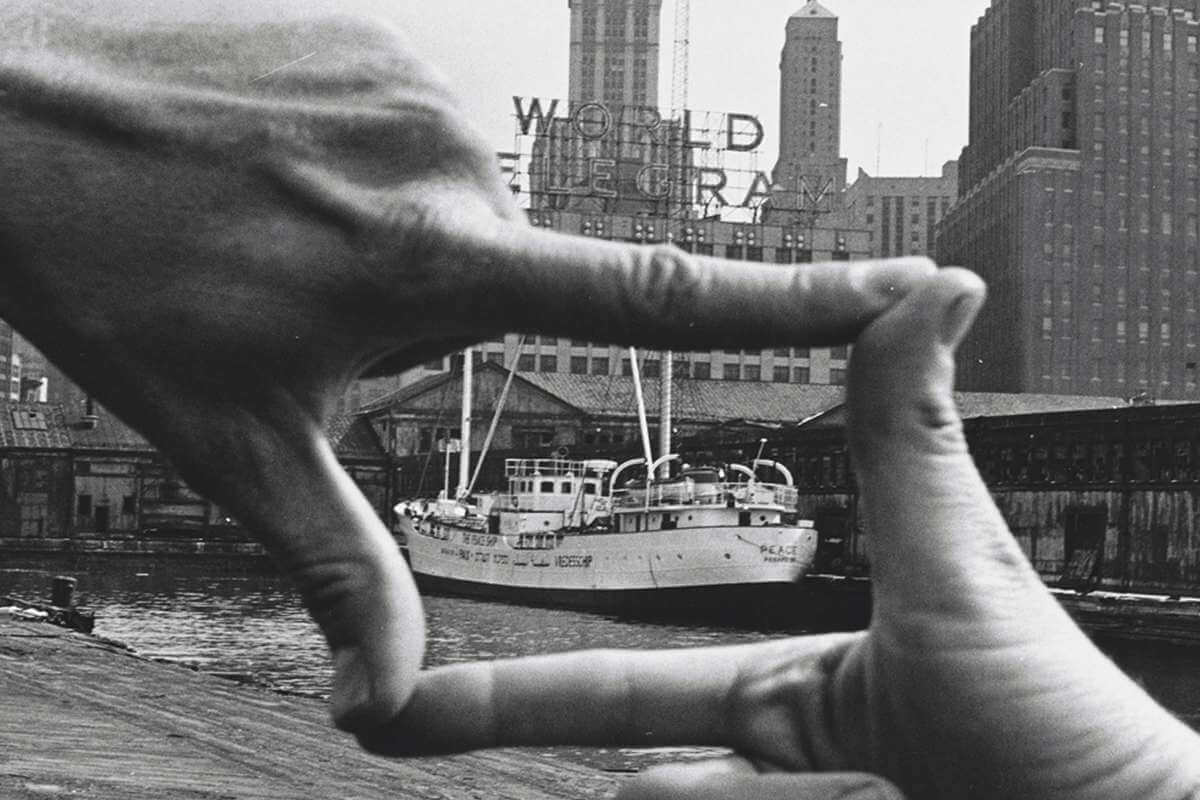
8. Using Mirrors
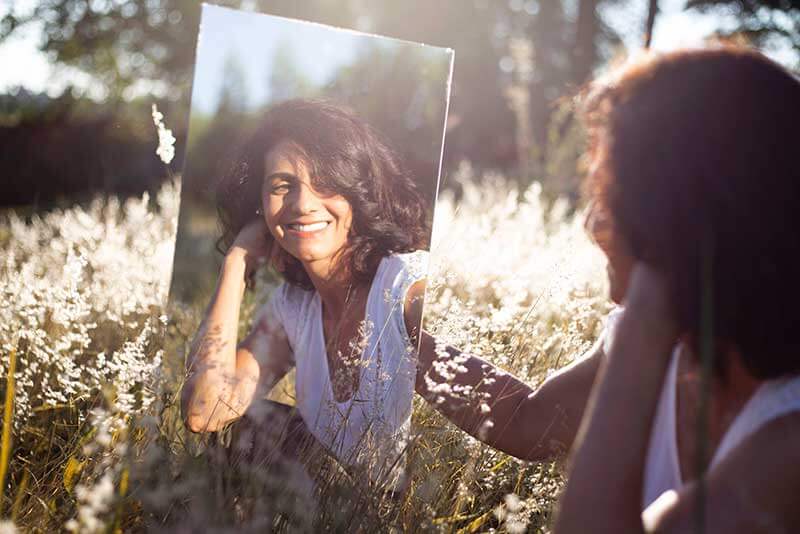
Mirrors are the most common frames people use since they are easily accessible in all locations. Mirrors, like windows and doors, create the illusion of frame in frame, elevating the visual appeal. With mirrors, minimalistic photography is also possible if the edge of the mirror is decorated. And all the other background elements are minimalist and don’t catch much attention from the viewer.
Let’s look at the above photo; it appears 3D because the focus is shifted to the mirror frame. So the first thing you see in the above picture is not the girl holding the mirror but the girl in the mirror herself. Pretty amazing. Right?
9. Using Trees and Branches
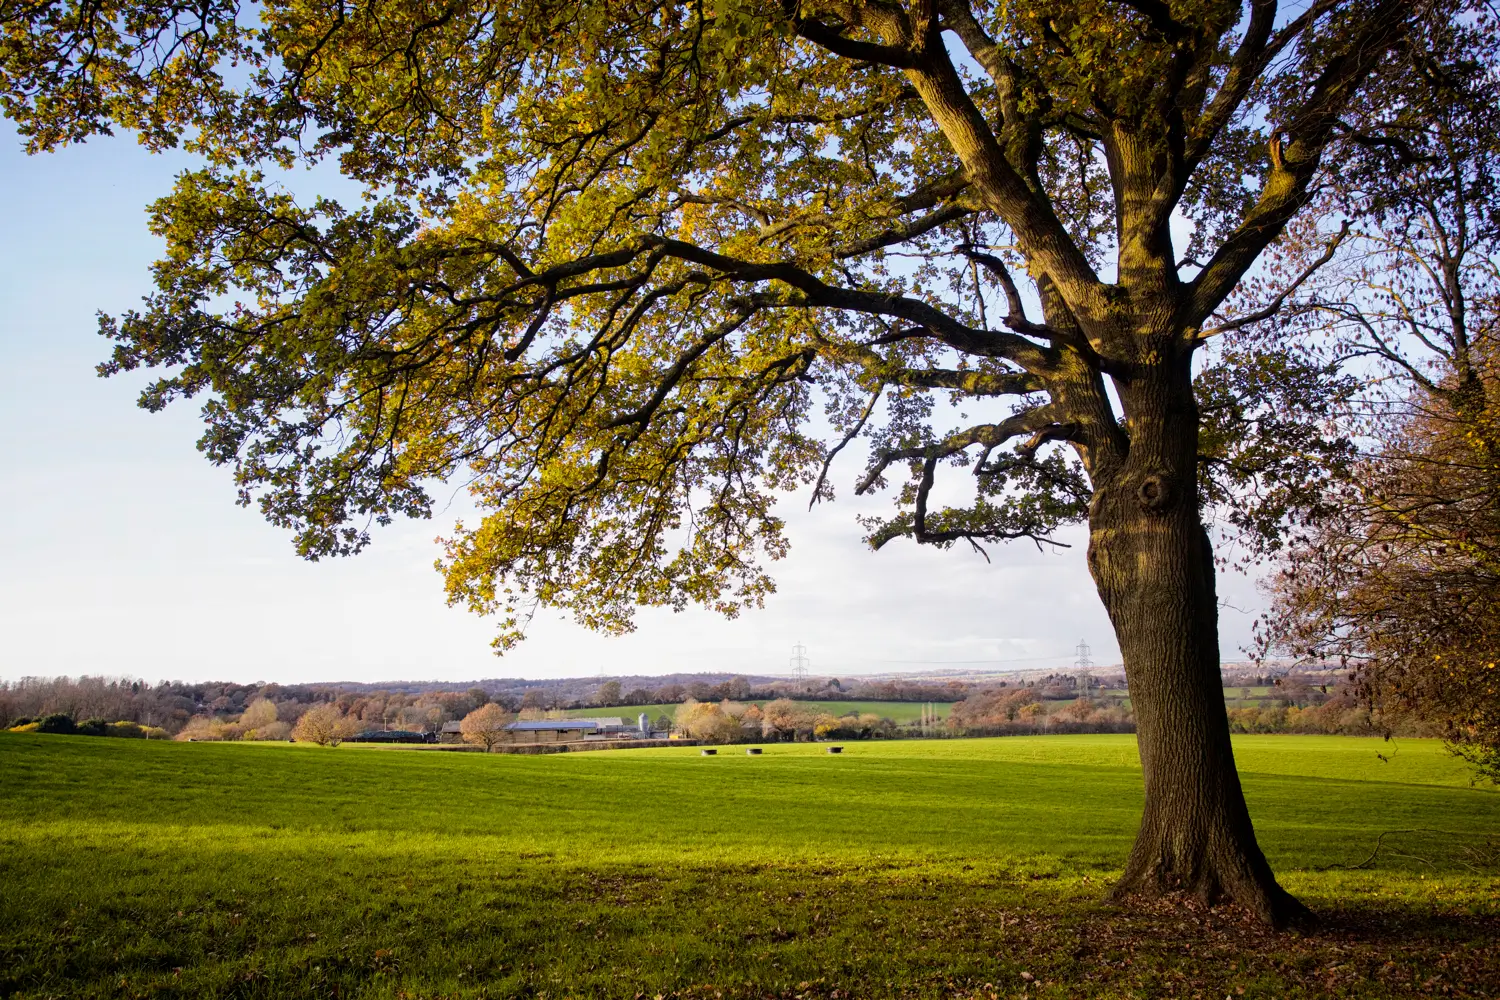
A place that is blessed with natural light is a boon for photographers. Add trees and their branches to the mix, and you got yourself the perfect place for framing and photography. For instance, an ideal place to find this kind of frame is on the mountain top or on the beaches where it’s possible to create a sense of depth.
Even in the above photo, the tree covers most of the frame, almost forcing our focus to shift to the landscape behind it, even when the tree is in front and covers a much larger area in the frame.
It should be noted that frames don’t necessarily have to be constituted of the same elements. Taking the example of the above photo, the branch on the top and lush green ground act as frames for viewers.
10. Using Negative Space
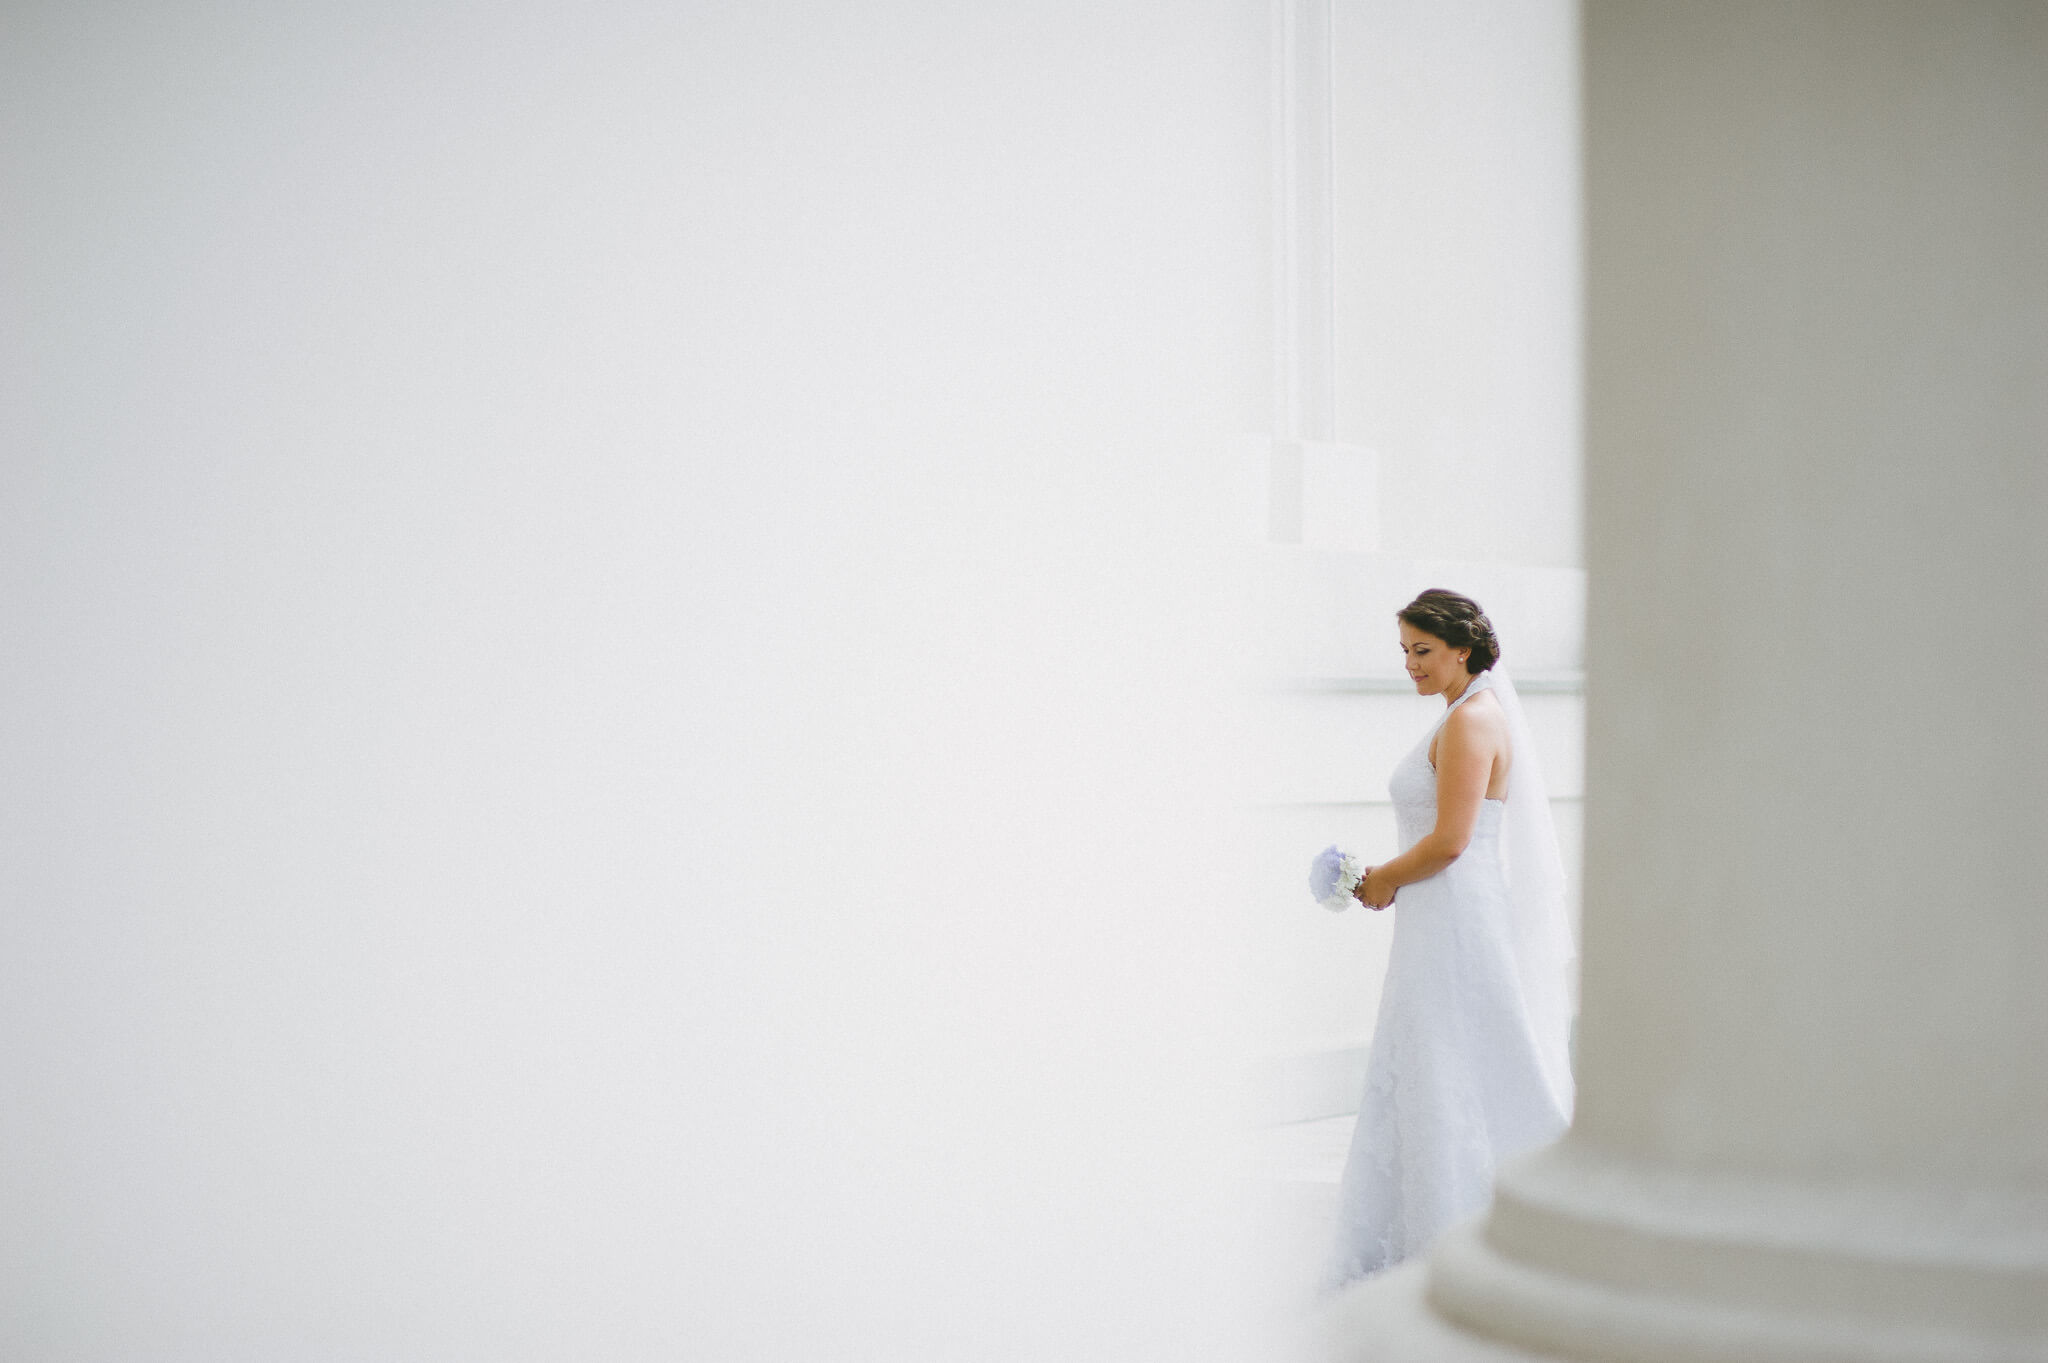
Negative space can be anything like an empty wall, a clear sky, and scenery. The only rule is it should have fewer elements of attraction so that the background looks separated from the main subject. Negative space is most widely used in bokeh photography, where only the main issue is in focus.
In the above shot, the bride has all the attention of the viewer since the other elements of the photo are simply missing or are so perfectly blended that the perception of difference in the viewers’ mind is essentially zero.
You can also appreciate the subtle contrast that the photographer did by using white shades to balance, which looks similar to the bride’s gown, beautifully capturing the moment.
Ready to Explore Frames in Your Next Shoot?
In conclusion, framing is an essential aspect of photography that can enhance the visual impact of an image. It allows the photographer to control the viewer’s attention and guide them toward the photograph’s subject. Photographers can create compelling and visually appealing compositions by using framing techniques such as leading lines, natural frames, and negative spaces. However, it is essential to note that framing is not a one-size-fits-all solution and should be used thoughtfully and intentionally to achieve the desired effect. As with any artistic technique, practice and experimentation are essential to mastering framing in photography. So, don’t be afraid to try new things and push the boundaries of your creativity to create stunning photographs that truly stand out.
There are even more frames than mentioned here, but we hope this blog gave you some starting pointers so you don’t feel lost when you step out with your camera. Also, do you have any other kinds of frames which you might want to share?


Leave a Reply