If you enjoy making your photos look better and more stylish, you might have heard about Lightroom. Lightroom is a super handy tool that helps you edit your pictures and give them a special touch.
One cool thing you can do in Lightroom is use presets.
So, in this easy guide, we’ll find out how you can use Lightroom’s ability to put presets on lots of photos altogether to make your pictures even more awesome with just a simple trick!
What are Lightroom Presets?
Lightroom presets like easy-to-use shortcuts for giving your photos a consistent style. They’re pre-made settings that change things like colors, brightness, and contrast in your pictures.
Instead of adjusting each thing separately, you can apply a preset to make your photos all look similar. Photographers and experts make these presets to make your pictures look better.
They can make your photos bright and strong or soft and dramatic, giving you lots of options to make your pictures look special.
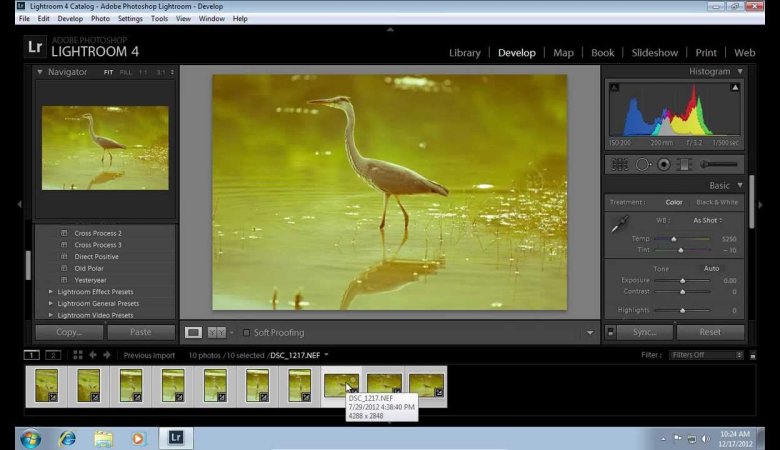
How to Apply a Preset to Multiple Photos in Lightroom
Step 1. Import Your Photos
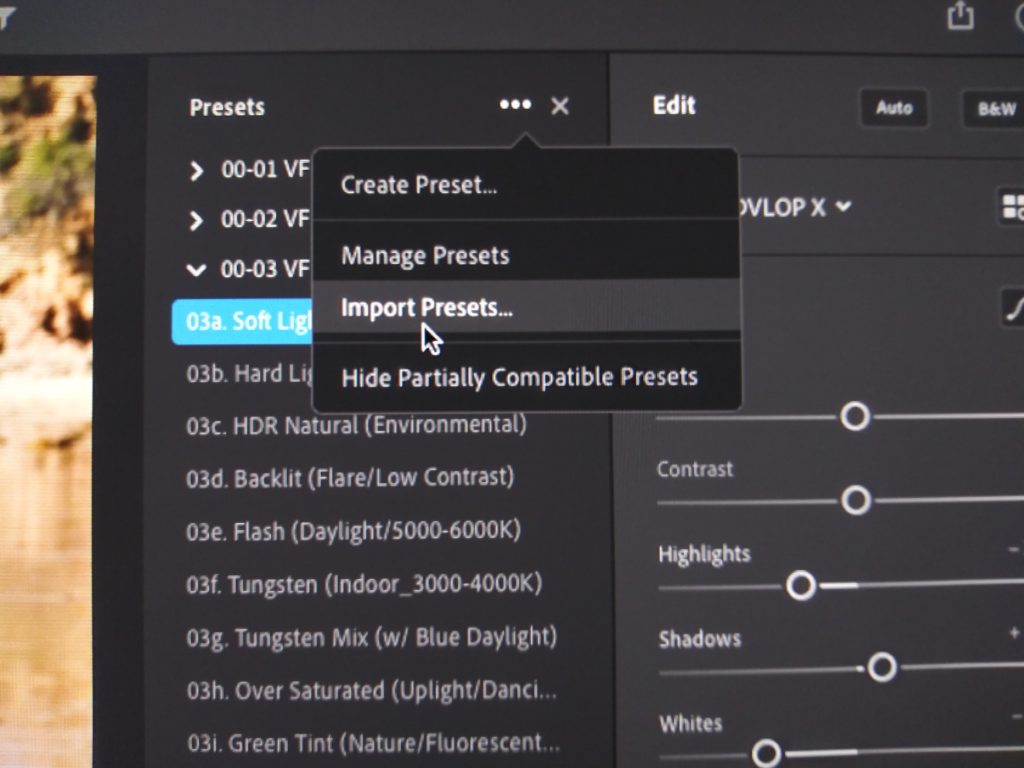
To begin, import all the photos you want to edit into Lightroom. You can do this by selecting “File” and then “Import Photos.” Choose the images from your computer and let Lightroom work its magic. Storing your high-resolution photos and preset collections might require extra storage. Use an external hard drive to keep your work stored.
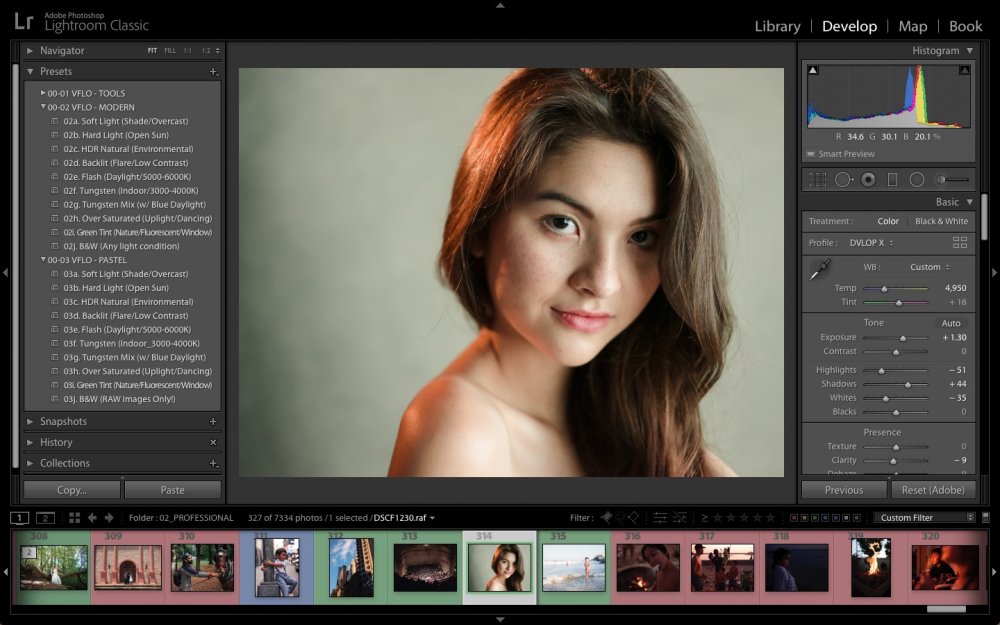
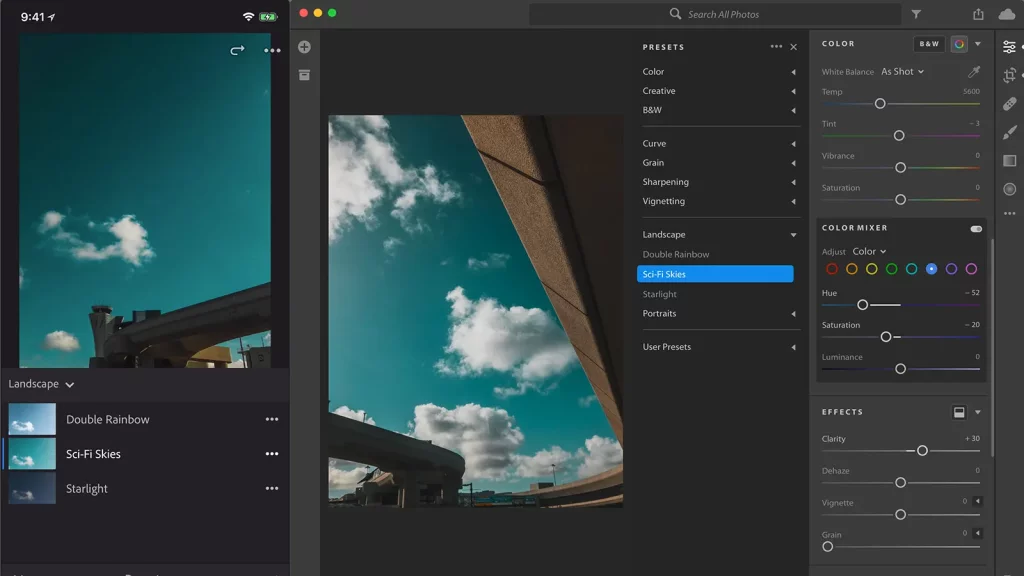
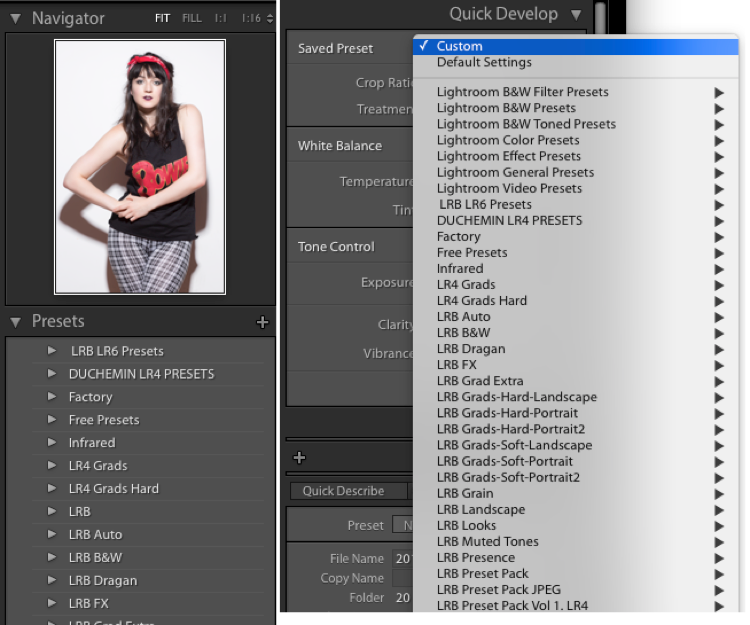
Step 2. Select a Preset to Edit Multiple Photos
Presets are quick filters that make your photos look better with just one click. In the Develop section, you’ll see the “Presets” panel on the left side. Open it to find many presets. Pick the one that matches how you want your photo to look and feel.
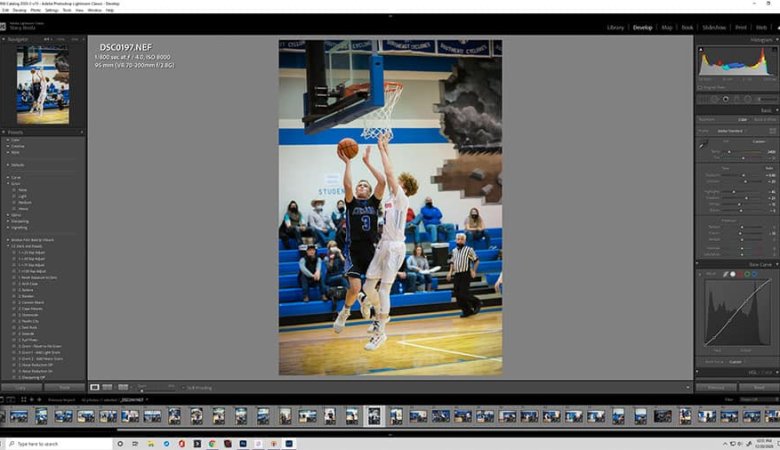
Step 3. Apply the Preset to Your Photos
For accurate editing, use graphic tablets for your preset adjustments. Select all the photos you want to edit using the preset. To do this, hold down the Ctrl key (Windows) or the Command key (Mac) and click on the desired images. Once selected, return to the “Presets” panel and click on the preset you’ve chosen. And! Your photos now have a perfect look.
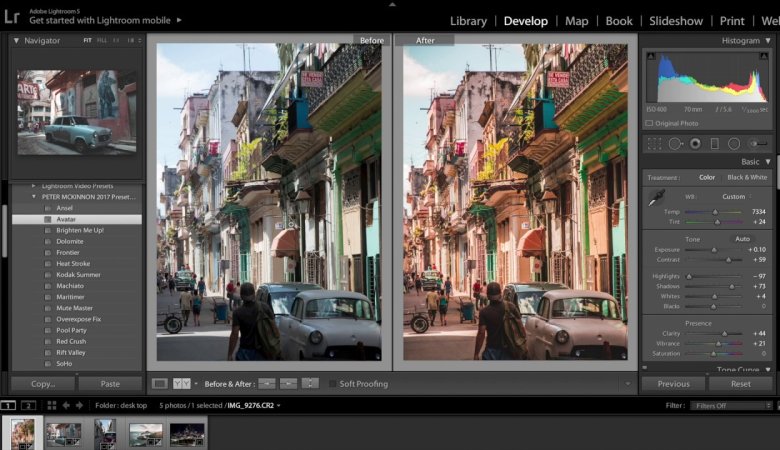
Step 4. Fine Tune and Apply Your Edits
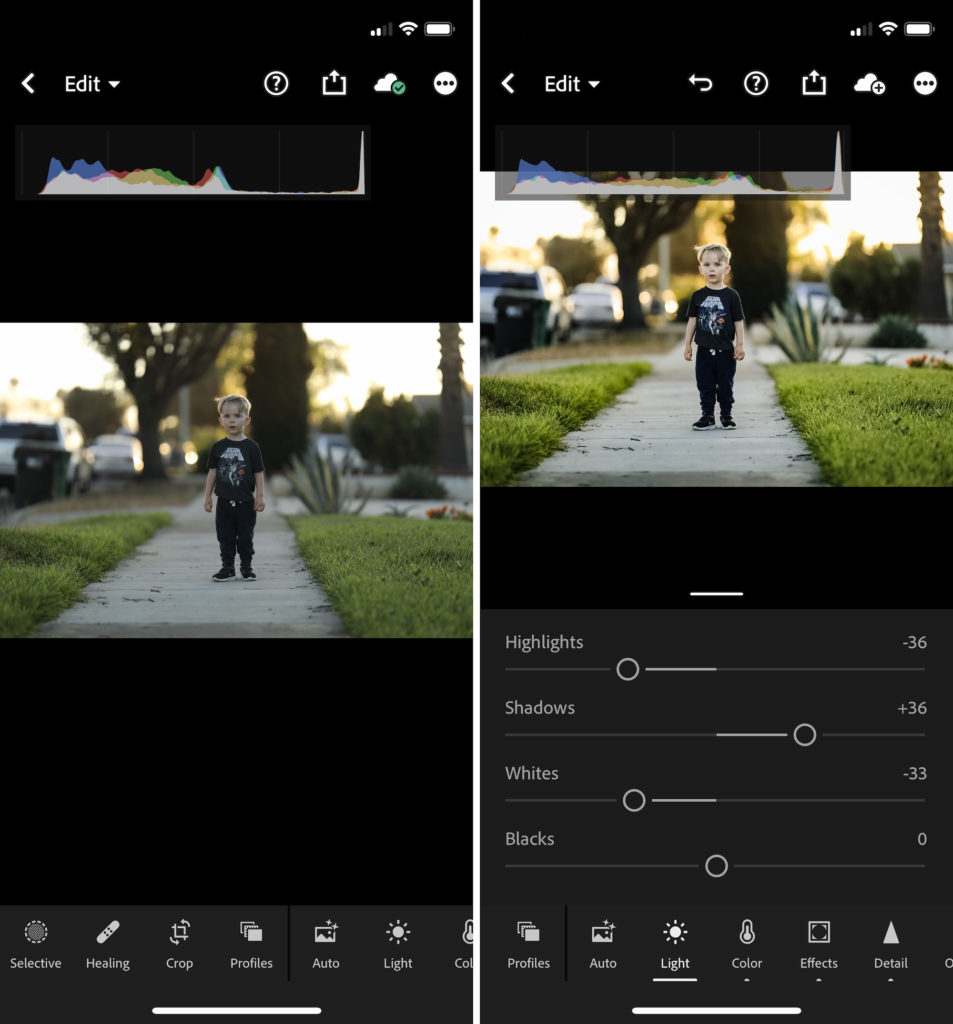
While the preset sets the tone, you might still want to add your personal touch. Use the editing tools in Lightroom to adjust aspects like exposure, contrast, and color balance. This ensures that each photo looks perfect and unique while maintaining the preset’s overall vibe.
Step 5. Syncing Selective Edits
If you’ve applied selective edits to a single photo that you’d like to carry over to the rest, Lightroom has you covered. With one photo’s edits selected, click on “Sync” at the bottom of the Develop module. Choose the specific edits you want to sync and watch as your images change uniformly. Once you’ve edited your photos with presets, use a photo printing machine to turn your digital creations into physical prints.
Applying Presets to Multiple Images in Lightroom
When you’re dealing with a bunch of photos in Lightroom, you can apply presets to multiple images lightroom; using presets can save you a lot of time and energy. Presets are like ready-made settings that help you quickly make your pictures look better.
Let’s check out some easy methods to use presets on many photos.
Method 1. Apply Preset While Importing
When you add pictures to Lightroom, you can use a preset at the same time. A preset is like a pre-made style that makes all your pictures look similar. While you’re bringing in the pictures, on the right side, there’s a part called Apply During Import. Here, you can pick a preset. When you do this, the preset you chose will be used for all the pictures you brought in. This helps keep your pictures looking consistent.
Method 2. Sync in the Develop Module
For better control, use the Develop module’s strong tool. Choose a photo with the preset you want. Adjust the Develop settings to match your desired look. Then, pick the other pictures where you want the same preset. If you’re looking for a consistent background for your images, use different photography backdrops to match your desired look. Tap the “Sync” button at the bottom right of Develop, and a box will appear. Check the settings you want to sync, then click “Synchronize.” This method is great when you have a particular look in mind for your images.
Method 3. Apply Presets in the Library Module
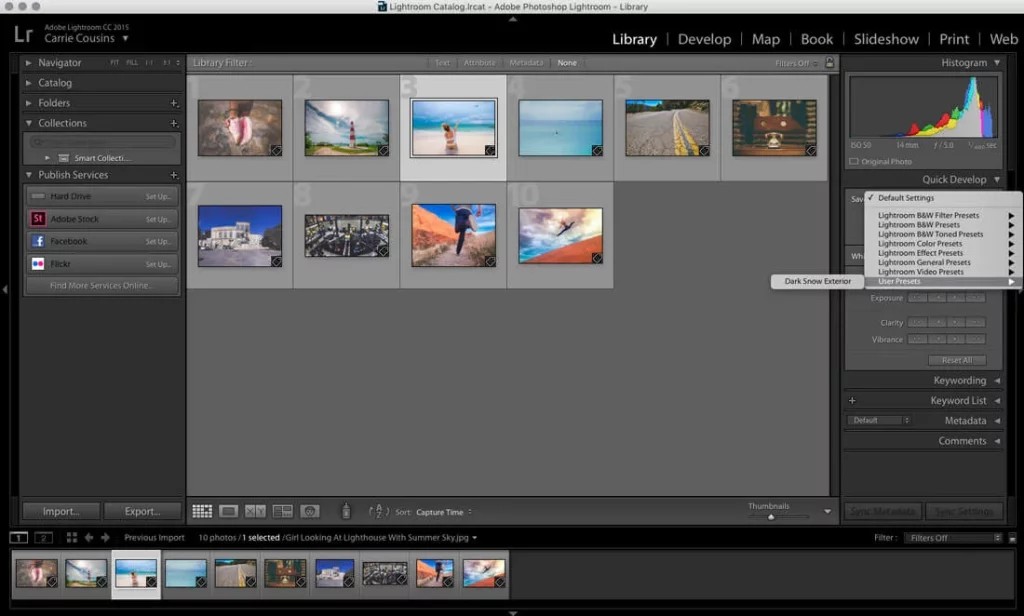
In the Library section, you can easily use presets on many pictures at once. Just pick the pictures you want to make better. Then, find the Quick Develop panel on the right. There, you can pick a preset from the menu and use it on the pictures you picked. This way is perfect for making your photos look similar quickly.
Which Method is Best to Apply Presets to Multiple Photos?
Your chosen method depends on your work and how much you want things to match. Method 1 is good if you want to bring things in smoothly. Method 2 gives you careful control in the Develop part, and Method 3 is fast for making changes in the Library part. Think about what you need and try these methods to find what works best for how you edit.
These methods help you use presets on some parts of your pictures, making them look better in a good way.
Conclusion
In Lightroom, you can give the same look to many pictures simultaneously. Presets are like magical filters that give your pics a special vibe. Then, you pick the other images you want to look like the first one.
You select them in Lightroom. After that, you apply the preset to all the chosen images. Remember, presets are your friend for fast and fancy edits. They make your photos look like a pro took them.
So, go ahead and make your pics pop with the same awesome style using Lightroom’s cool preset power!
Leave a Reply