Like everybody else, you have seen the beautiful photos uploaded by photographers and Instagram influencers on social media. How do they do it? Why are your photos just average? Do they shoot these things by themself, or do they have help? The answer to all these questions is Lightroom presets. As social media content grows, Lightroom presets help influencers, photographers, and even smartphone photographers make necessary photo edits.
Editing photos takes a lot of time, but you may need more time to devote to editing. Lightroom will help cut down the editing time if you have limited time. But these presets will help you get your work done even faster.
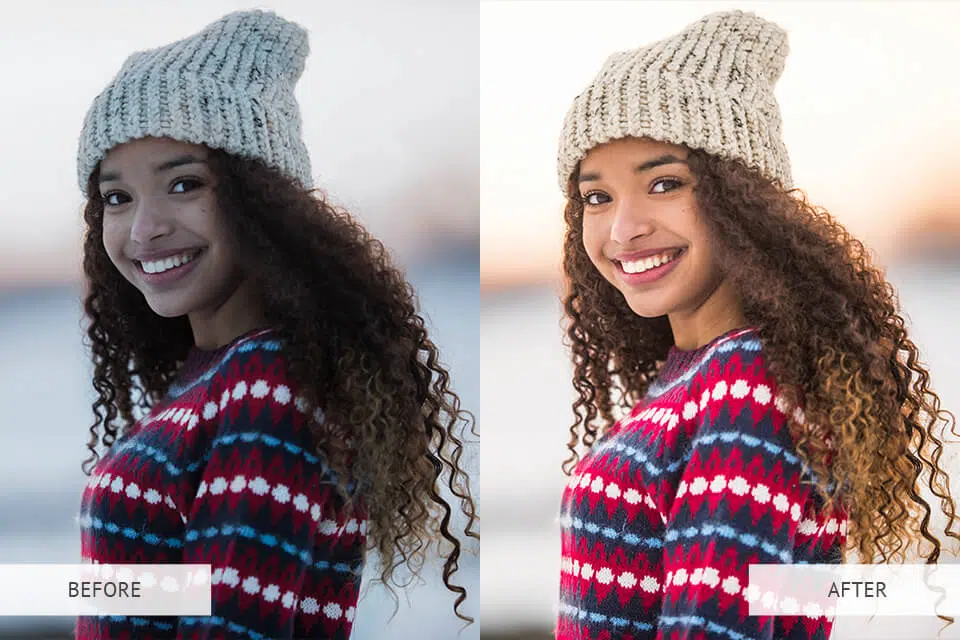
Presets are pre-defined effects that can be applied to your photos, and you are done. If you dislike the changes, revert to the original image anytime. In this article, a Lightroom preset guide will help guide you through this process, and you will be editing photos professionally in no time.
So let’s get started on these Lightroom presets. But first, let’s answer all your burning questions if you are new to this subject.
What is Lightroom?
It is imperative to have a basic understanding of what Lightroom is. Once you have your basics, then you can build on it. Adobe Lightroom is a software that does image organizing and editing. Adobe has made other popular software like Photoshop, Photoshop Express, Premiere Pro, After Effects, and many others. In Lightroom, you can import, edit, organize, and share images in JPEG, TIFF, RAW, and more. The editing features of Lightroom include white balance, exposure, color grading, lens corrections and calibrations, HSL colors (hue, saturation, and luminance), and tone curve.
Basic Photoshop edits like filter adjustments, spot removal, and tone adjustments can also be done. Lightroom keeps all your images in one place, so your workflow becomes quick and consistent throughout your editing. All the changes you make get automatically saved in your Lightroom catalog, along with the editing history.
What Are Lightroom Presets?
Lightroom presets are image filters where you use pre-saved settings for photo editing. You can make changes with just one click. Your photos will have a consistent style due to the presets. You can buy presets from your preferred creators or create your own preset. Even batch editing is possible for your photos.
1. Versions of Lightroom
There is Lightroom Classic CC, Lightroom CC, and Lightroom Mobile. Lightroom Classic CC was introduced first, and the Lightroom CC is the newer version. Lightroom Mobile is an editing app done on your cell phone or mobile.
2. Differences Between the Versions
- Lightroom Classic CC is the original software; it is desktop-based since it needs powerful processor power. It has basic editing features like exposure, color grading, white balance, tone curve, presence, HSL colors, detail, professional features, and customizations.
- Lightroom CC is the more recent version; you get a simplified and intuitive interface perfect for beginners, those who want to do photo editing but want to make some changes, or those who want to use presets. Lightroom CC is cloud-based to sync across multiple devices like your cell phone on Lightroom Mobile. All your files and edits are saved automatically in the cloud, so if you are traveling, you will love this feature.
- Lightroom Mobile is a photo editing and camera app on Google Play and Apple App Store. This app is the best choice for anybody who is not a professional photographer or a smartphone photographer. You can take photos and edit them flawlessly.
- Lightroom Classic CC is recommended since it is more powerful and has impressive features. If you get Adobe Creative Cloud, you will have both the software. Of course, Lightroom Mobile is free to download for anybody.
3. Desktop and Mobile Lightroom Presets
There are Lightroom presets for the desktop version and mobile version. With Lightroom Mobile, you can edit JPEG images with just one click. On the desktop, RAW photos or high-resolution JPEGS are edited in Adobe Lightroom Classic; professional photographers use this for editing photos with a monthly subscription.
How to Use Lightroom Presets?
1. Using Lightroom Presets on Desktop
Next on the Lightroom presets guide is to learn how to use the presets. First, you must buy the presets, download the link you received in an email, and upload the preset to Adobe Lightroom. Import the images and categorize them based on importance. The preset you use depends on the image’s destination and type. See which one of your presets is better suited for your photo.
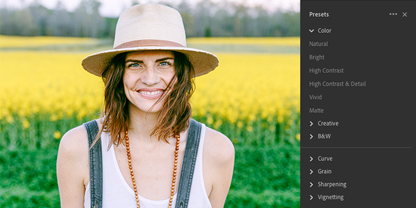
In the Develop Module, the Navigator Panel is on the right side, and you will see the presets option. When you click on the triangle next to the presets, there will be preset folders since Lightroom comes with some presets already built in. In these preset folders, you will find individual presets you can apply to your images. You can even preview the preset with a miniature version of the photo visible on the top of the Navigator Panel.
With the preset, you can work on the exposure, which will brighten up the image based on your preference. See if you need to bring up or down the image highlights; focus on which shadows need to be lifted. Adjust the blacks and whites and see how much clarity your image needs. Alter the image’s white balance and HSL, which stands for hue, saturation, and luminance. In the Colour Grading panel, you can make minor tone adjustments.
After all of that, you can make the selective edits. These edits are done to a particular section of the image, and no modifications are made to the rest. These selective edits may include spot removal, gradient filters, brush tool, or radial filters.
Time for any final image adjustments. Look over the image and see if you missed anything. Now it is time to export the images. Images need to be cropped based on the intended medium. If you do not like the changes made by the preset, go to the bottom of the editing panels and press the Reset button. Your image will be in its original form once again.
2. Using Lightroom Presets on Lightroom Mobile
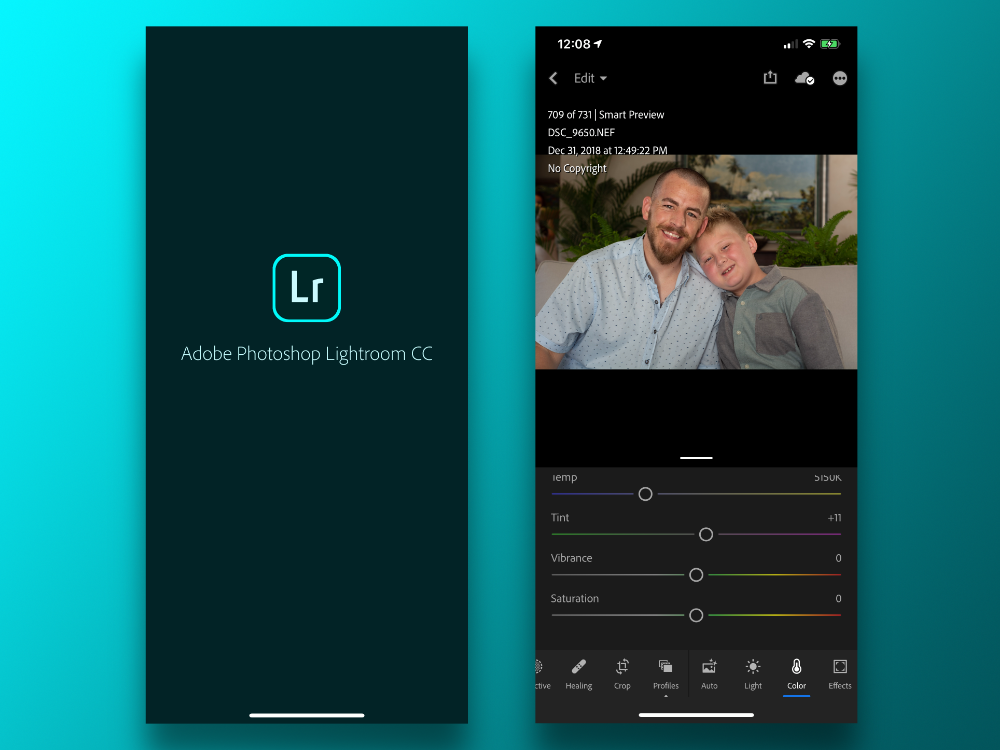
Your desktop and mobile accounts can be synced with an Adobe Creative Cloud subscription. Once again, the Lightroom Mobile app is free to download on both Apple and Android devices. You use the same process for editing your mobile photos. Once you are done, crop the image, export it to your camera roll, and upload it to Facebook, Instagram posts, or Instagram stories; the app has optimized export settings for social media, so uploading is much easier than before.
You can even buy mobile presets since a wide range of them are available.
- FOREST Lightroom Mobile
- RETRO Lightroom Mobile
- SUMMER Lightroom Presets
- Black and White Presets
- WEDDING Lightroom Presets
- ADVENTURES Lightroom Presets
Installing the Lightroom Presets
You can buy presets or use free presets in Lightroom. So, another important part of the Lightroom presets guide is installing presets. Before installing any presets, you need to know what your file format is; it is either XMP file format or LRTEMPLATE file format. You should also have the latest version of Lightroom Classic CC.
For the XMP file format, go to the Develop Module and then to the Preset folder on the left-hand side. You click on the plus (+) button and click on the “import presets” option in the pop-down menu. A standard Microsoft or Mac file folder will pop up, and you need to navigate to where the downloaded preset is saved. Select the preset file and click import; the preset file can be in a zip folder or not; either one will work. Once the importing is done, you can see the preset saved in the preset folder, ready to use.
For the LRTEMPLATE file format, there are two ways, but first, you should extract the downloaded preset files if they are in a zip folder. On a Mac, you need to go to the top toolbar and click on Lightroom Classic and Preferences. On a PC, you go to Edit and then Preferences. Once the Preferences dialogue box is opened, click on the Presets tab. Under the Location category, there is a Show All Other Lightroom Presets button which you will click on. In the dialogue box, choose the Lightroom folder and then the Develop Preset folder. You must copy and paste your downloaded preset folder into the Develop Preset folder. Then, you need to restart Lightroom, and the new presets will be available for you to use.
For the second method for the LRTEMPLATE file format, go to the Develop Module, find the Preset panel on the left side, and click on the plus (+) icon again. Click on Import Presets, and when the dialogue box opens, manually select the downloaded preset file or multiple files and click the Import option. You will find the new preset in the User Preset folder on the left-hand side panel; they are ready to be used on your images.
Making Your Own Lightroom Preset
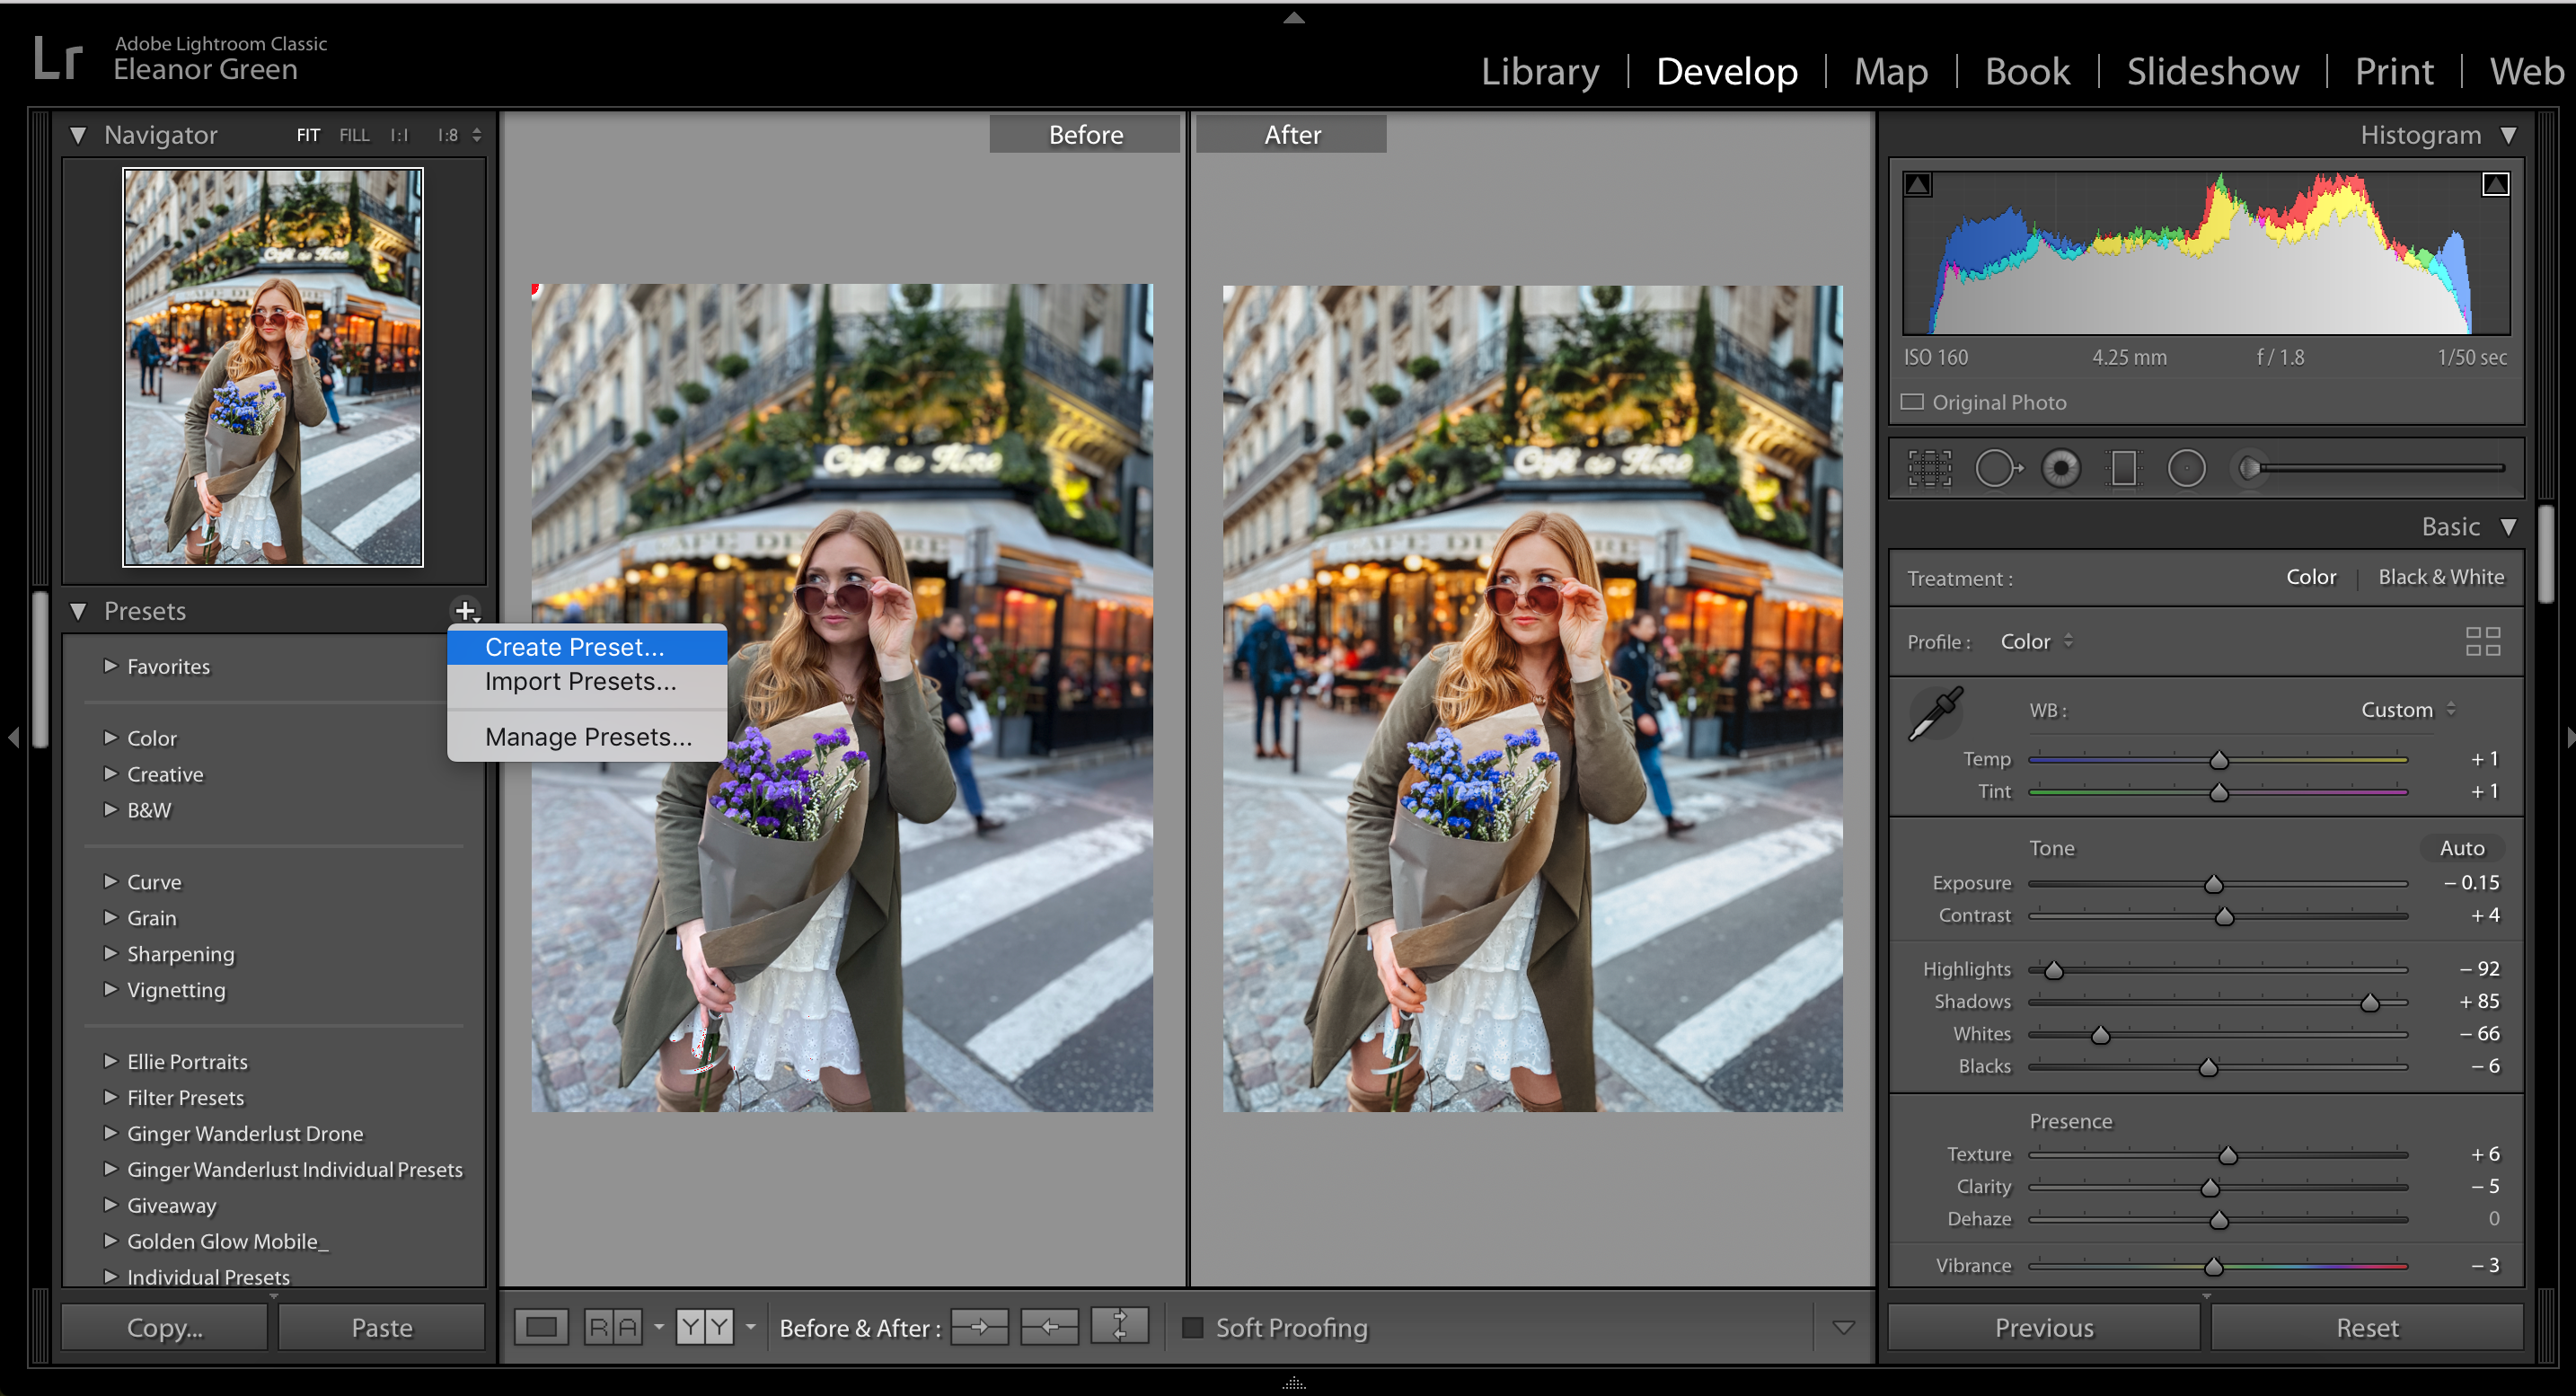
If you repeatedly use a particular set of editing steps, you can make these steps into a preset. First, you take an unedited image and play around with the Develop Module’s sliders until you are satisfied with all the editing. Go to the Navigator Panel on the left side and head to the Presets section. Click on the plus (+) button on the right-hand side. The “New Develop Preset” dialogue box will offer different setting options. See which settings you want to save by checking them and which you do not by unchecking them. Type in a descriptive name for the preset and select which preset folder to save your new preset; otherwise, it will be the User Presets folder.
Advantages of Lightroom Presets
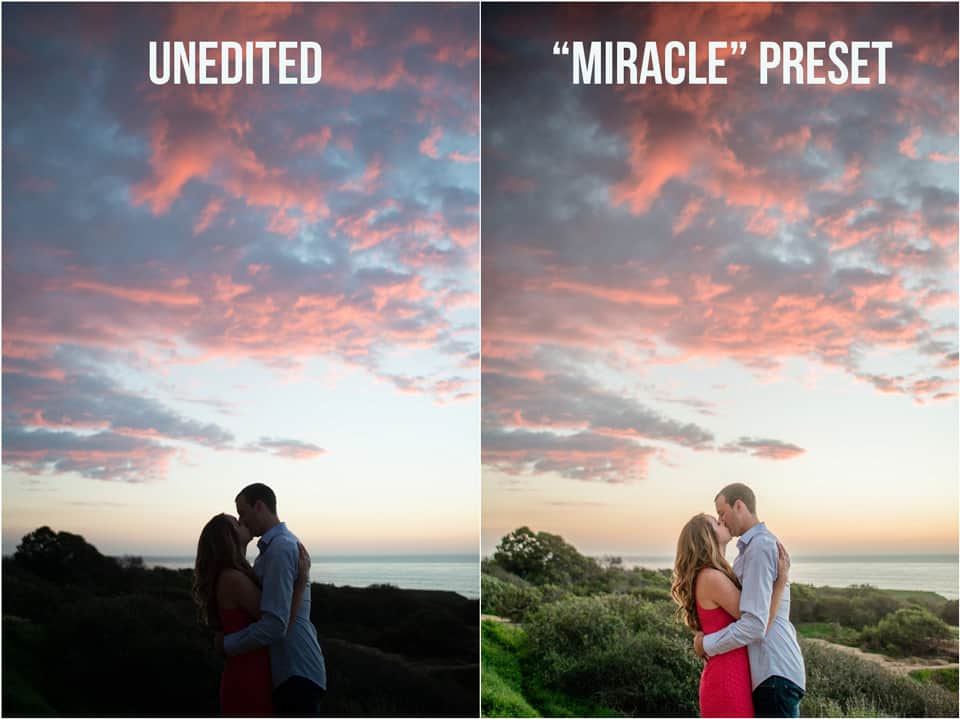
There are many advantages of using Lightroom presets. A preset allows all your photos to have a consistent style. Each preset has its contrast, tonal range, and colors, and whichever aesthetic you want, you will get.
Presets help you speed up your editing process. The photos have a consistent style, and your editing workflow is faster. So, buy your favorite presets.
With Lightroom, you can create your own presets. Customize the presets for specific lighting and different environments. If you are editing a photo taken in the morning, you can use the preset on all the other photos you shot in the morning.
Final Thoughts
When it comes to photo editing, Adobe Lightroom is your best friend. All professional photographers use photo editing software to brighten up and touch up their photos. That’s why their portfolio is filled with beautifully shot and edited photos. Instagram influencers now use these kinds of software to have flawless photos.
With Lightroom, you can fix the image’s white balance, color grading, exposure, lens corrections and calibrations, tone curve, and HSL colors (hue, saturation, and luminance).
You must use some Lightroom editing settings quite regularly; they are called Lightroom presets. All the editing settings are saved under a preset, and all the changes are done to the images with a click of a button.
With a Lightroom presets guide, you can learn about the different Lightroom versions, why you should use Lightroom presets, how to use Lightroom desktop and mobile, how to install presets, and other important guidelines.
Write in the comments below about your experience with Adobe Lightroom and presets.
Leave a Reply