Photography can be an immensely rewarding pastime. If you are choosing Canon Cameras for Beginners, then this is something good you are opting for. Congratulations on picking Canon as your camera brand if you are just getting started.
Canon cameras are a terrific option for novices because of their well-regarded, user-friendly UI and excellent image quality. However, if you are unfamiliar with the technical jargon, setting up a new camera might be frightening.
But don’t worry; we will walk you through the crucial steps and procedures for your Canon camera for amateur photography.
Step-By-Step Guide to Set up a Canon Camera for Beginner Photography
1. Become Familiar With The Camera
Consider spending some time becoming familiar with your Canon camera before going into the settings. To fully comprehend the many buttons, tires, and capabilities it offers, read the user manual carefully. Learn how to use the camera’s fundamental functions, such as turning it on and off, adjusting the zoom, and navigating the menu.
2. Insert the Memory Card and Charge the Battery
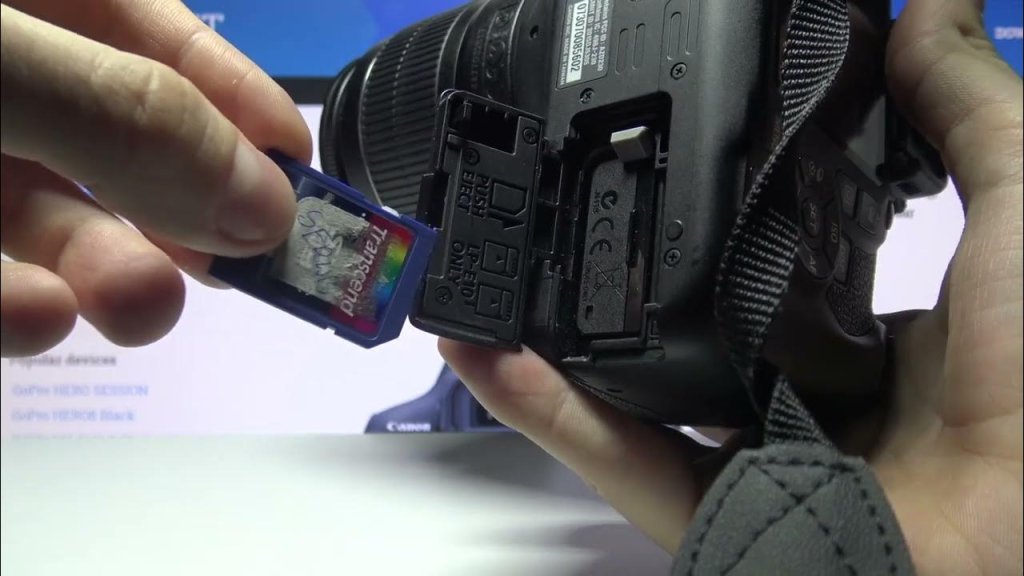
Before you begin shooting, make sure the battery in your camera is completely charged. Your photographic ambitions may suffer greatly if your battery dies. Incorporate a suitable memory card into the camera as well. To manage the enormous file sizes and burst shooting, a high-capacity, quick memory card is advised.
3. Set the Date and Time
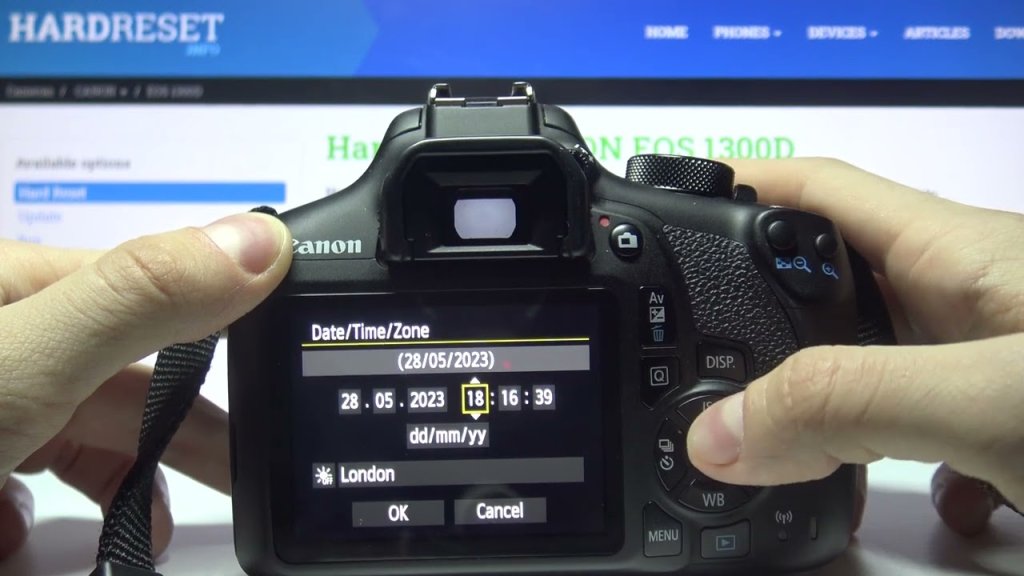
To set the proper date and time, locate the date/time settings in the camera menu. Although it may appear little, this is essential for subsequently organizing and identifying your images.
4. Select the Ideal File Format and Image Quality
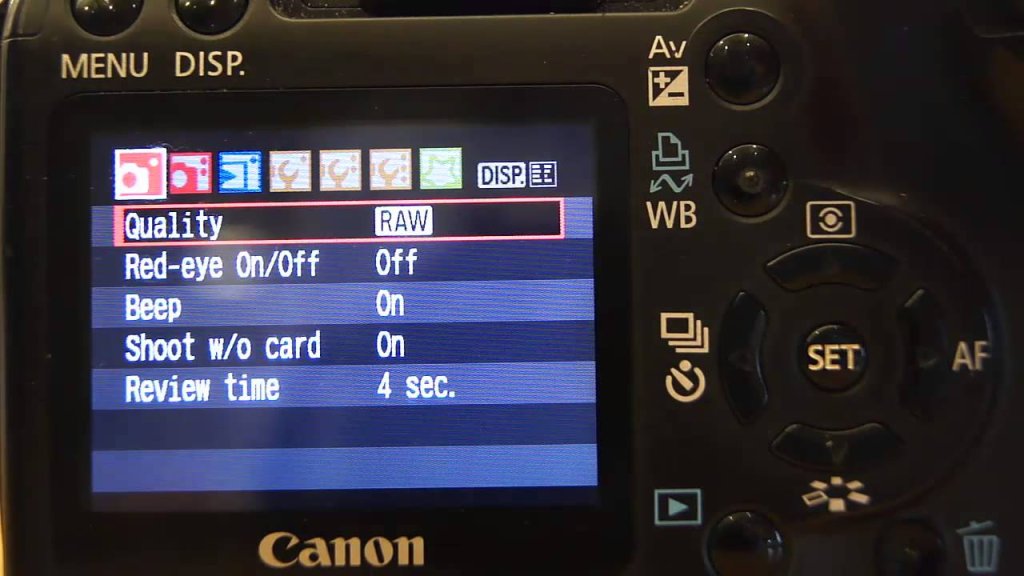
Names like Large, Medium, and Small typically indicate the many image quality settings available on Canon Cameras. The Large Picture Size, which offers the maximum resolution for your images, is the choice you should make as a no voice. Additionally, if you want greater freedom over editing post-processing, select the raw or raw + jpeg file type. JPEG files are more portable and smaller, but they offer less flexibility for sophisticated editing.
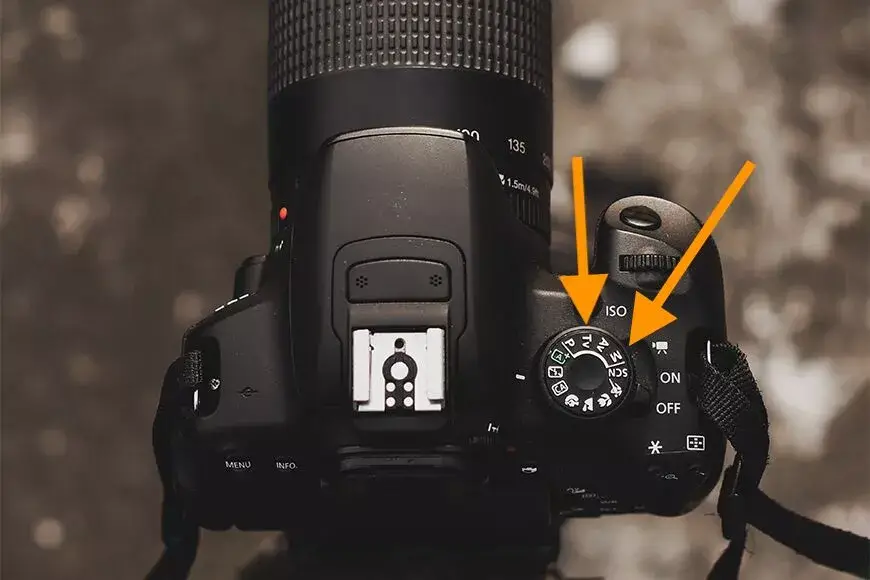
5. Select the Auto Focus Mode
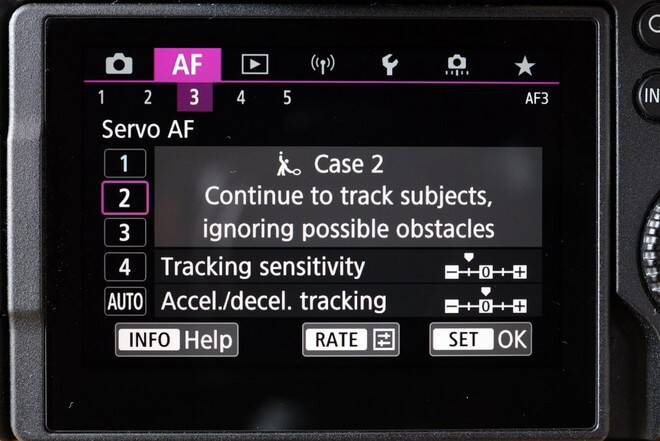
Adjusting focus is made easier with autofocus since the camera does the work for you. The shot autofocus option is best for still subjects for new photographers. Consider utilizing artificial intelligence servo autofocus if you want to photograph moving objects such as sports or animals. Explode different settings to learn how they behave, then choose the one that best meets your photography requirements.
6. Set the Drive Mode

Your camera’s drive mode controls how it takes pictures. The single shot or normal drive option is adequate for the majority of general photography. If you want pictures of an activity that is happening quickly, choose continuous drive mode to take plenty of pictures quickly.
7. Get Familiar with The Exposure Triangle
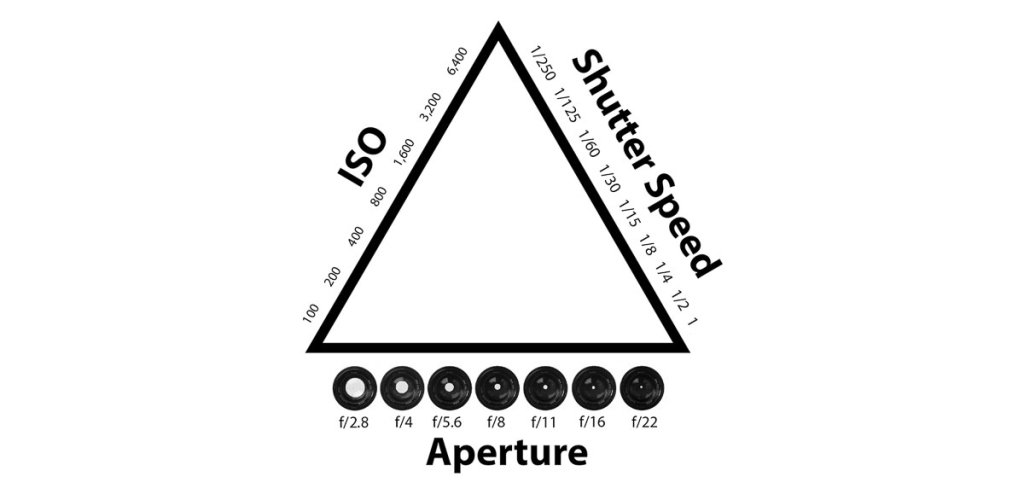
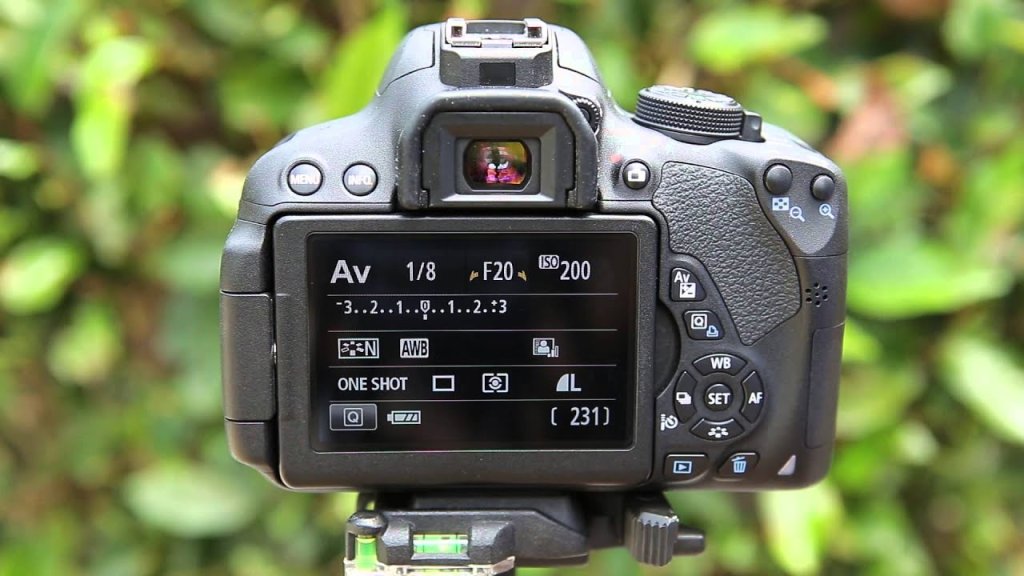
Aperture, shutter speed, and ISO are the three components that make up the exposure triangle. You will get the ability to exert creative control over your images once you have mastered these settings. Start with a semi-automatic setting by using Aperture Priority Mode(AV) or Shutter Priority Mode(TV), then let the camera take care of the rest.
8. Adjust the Aperture
How much of your image is in focus depends on the depth of field, which is controlled by the aperture(lower f-stop value, such as f/2.8) in Aperture Priority mode to create a narrow depth of field, which is perfect for portraits and subject isolation. To keep everything in focus when photographing landscapes, use a smaller aperture( higher f-stop value, such as f/8 or f/11).
9. Adjust the Shutter Speed
How long the camera’s sensor is exposed to light is determined by the shutter speed. The freezing of motion at faster shutter speeds (1/500s and higher) makes them ideal for action photography. Slower shutter rates (1/30s and below) produce motion blur, which is excellent for shooting nighttime images or showing movement. Set the required shutter speed in the shutter priority mode, and the camera will choose the proper aperture.
10. Control ISO Sensitivity
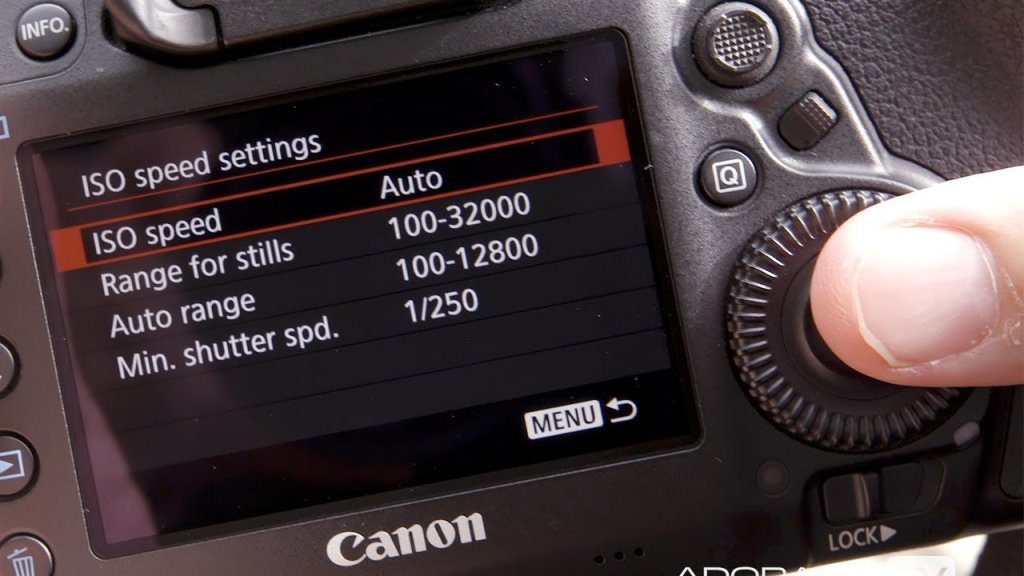
ISO impacts the camera’s sensitivity to light. Lower ISO settings (such as ISO 100) result in clearer, noise-free photographs, but they also call for more light. In low-light conditions, higher ISO values(such as ISO 800 and above) can be helpful, but they also increase the risk of grain or noise in the image. Start with a lower ISO and only increase it when necessary to keep the quality of the image.
11. White Balance Adjustments
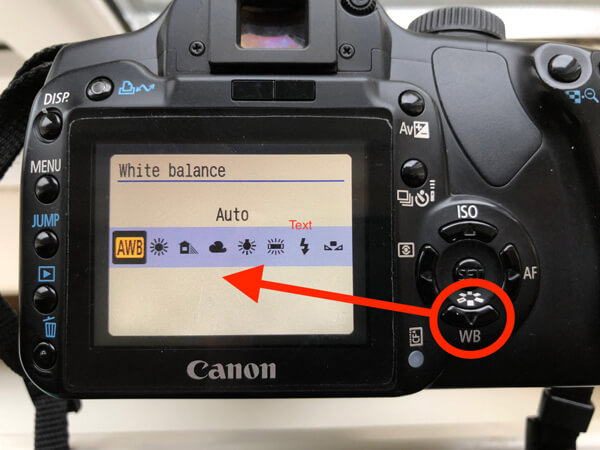
The white balance in your photographs makes sure that the colors appear precise and natural. The Auto White Balance setting is a secure choice for novices. To get more pleasant images, try experimenting with various white balance presets in specific lighting situations, such as inside or during sunsets.
12. Framing and Composition
Finally, keep in mind that photography is about aesthetic expression as much as technical parameters. To produce aesthetically captivating photos, pay close attention to composition and frame. To add interest to your photos, use the rule of thirds, search for leading lines, and try out various perspectives.
Conclusion
At first, setting up your Canon for beginning photography may seem intimidating, but with time and effort, you will get more accustomed to your equipment. Explore more options, including flash settings, exposure compensation, and creative effects as you acquire the skill.
Your Canon camera will be your devoted travel partner on this thrilling excursion as you embark on the road of continual learning that is photography.
So go outside, start taking pictures, and enjoy capturing lovely moments!


Leave a Reply