
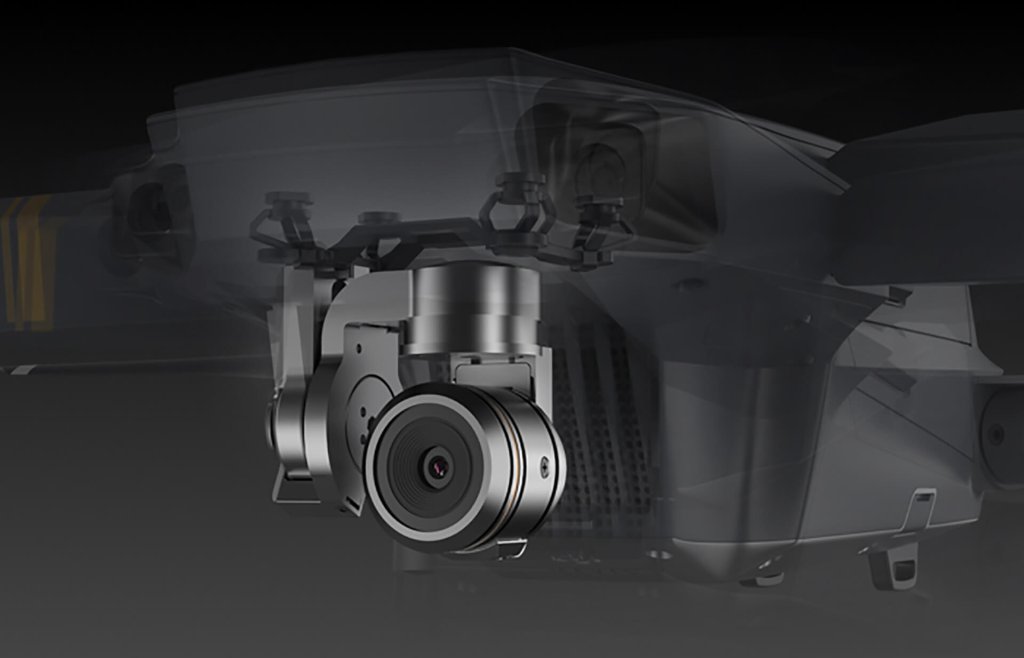
Drones are so fascinating. They landed on the scene a decade ago but are still grabbing attention for their genius build and abilities to capture cinematic shots from up in the air.
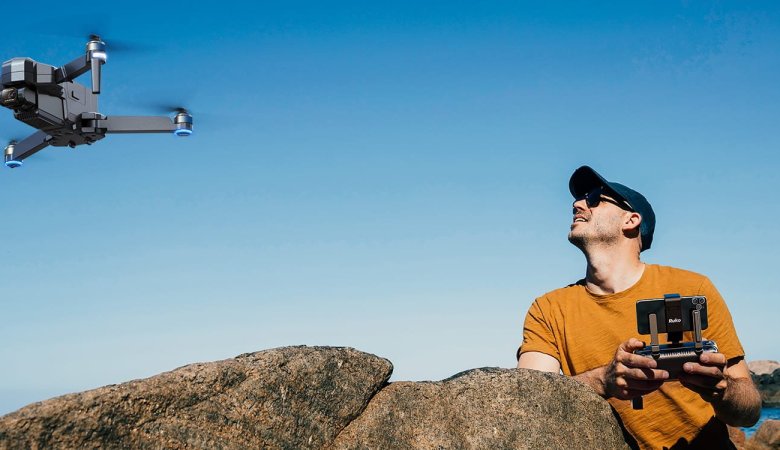
And you don’t have to know the professional level of photography and video shooting to be able to use them. Drones, though they appear complicated devices, are actually easy to use and take shots with. You need to know certain settings to control the camera drones for beginners and capture all that you want that can’t be captured from your place on the ground.
And yes, the information can be quite overwhelming at first, but give it some time, and you will be operating a drone camera with so much finesse that you will surprise even yourself.
In this article, we talk about the best drone camera settings that will give beginners a headstart in capturing aerial shots with drones.
Effective Drone Camera Settings for Beginners
Here are 5 important drone camera settings that will help beginners click and shoot awe-inspiring photos and videos.
1. Exposure Setting
This setting can make or break your drone photos. Exposure settings are the brightness settings that allow you to set the right amount of light for your shots. Underexposed photos will be too dark, and overexposed photos will be too bright. So, you have to create the right balance for your photos to be soothingly vivid and closer to the real thing. To set the exposure settings, you need to put them in manual mode from automatic mode.
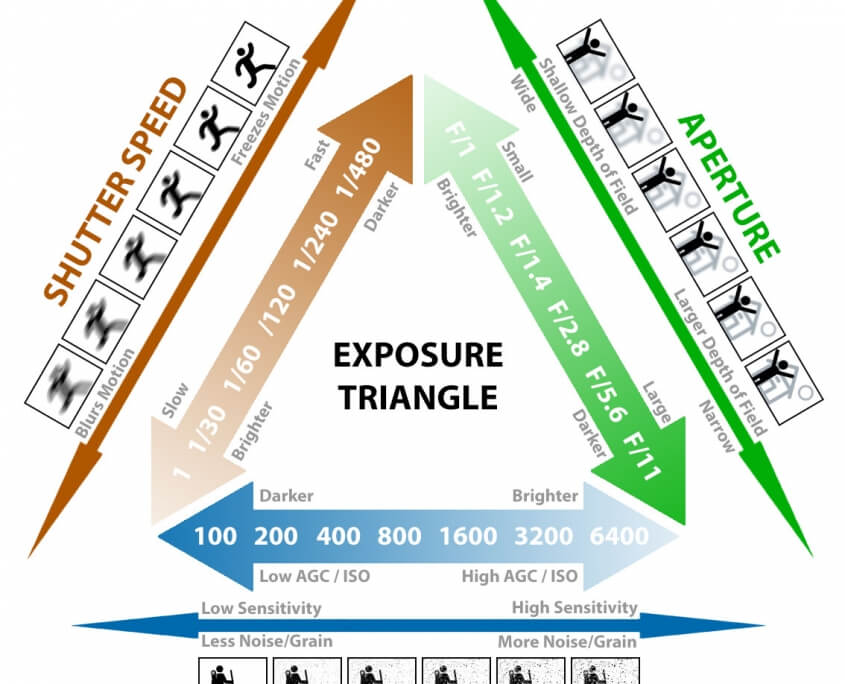
There are three aspects of exposure settings that you will be configuring- ISO, Aperture, and Shutter Speed.
Let us understand all three in a little detail below.
- ISO: The measurement value of the sensor’s light sensitivity is ISO. The ISO of drone cameras is normally in the range of 100 to 12000. You must set the ISO as low as possible because the lower the light sensitivity is, the higher the picture quality will be. If you click photos with a high ISO, it will turn grainy with lots of distortion.
- Aperture: An aperture is the small opening in the camera’s lens that controls the amount of light that passes through the lens. The amount of light that passes then decides the quality of the focus of the subject and the blurring of the background. So, this is an important exposure setting that you must be aware of and know how to use. Of course, you can always go for drone cameras that have fixed apertures to remove the need to adjust them. Still, if you are looking for far better results that cater to your vision of a photo, you must choose drone cameras with adjustable apertures. The setting for aperture can be made using the f stop option by changing the f numbers from smaller to larger depending on the kind of depth, focus, and blurriness you need in your photo.
- Shutter Speed: The speed of the shutter is an important decider of how bright your picture will be. The shutter regulates the amount of light entering the sensor. Shutter speed is simply the amount of time the shutter stays open. So, if you choose for the shutter to be open longer, then more light will enter the sensor, resulting in brighter images. If you choose the shutter speed to be shorter, the light entering the sensor will be less, and images will be darker. Shutter speed also helps you capture motion blur in a photo. It helps you capture a moving car with the perfect amount of blur and clarity to make it appear moving. This motion blur is captured with a slow shutter speed. Conversely, increasing the shutter speed to capture moving objects gives them the impression of being completely still and in clear focus.
2. Image Composition
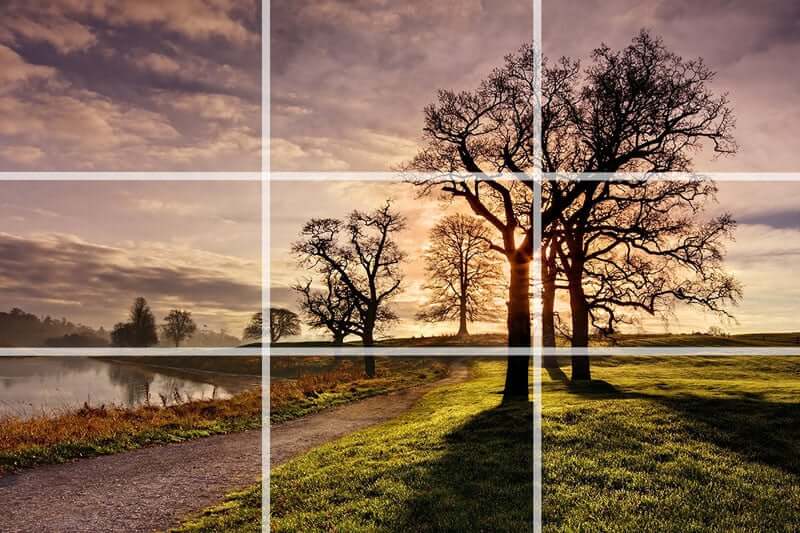
Whether you are taking the image of a mountain surrounded by greenery, a person riding a bicycle amid tall trees, or a river flowing – there is a subject in all of your photography that you are willing to capture. Image composition helps you put extra focus on your subject so anyone who sees it knows what the photo is trying to say. This simple yet handy tool lets you get the desired results in all your shots.
3. Raw Image Format
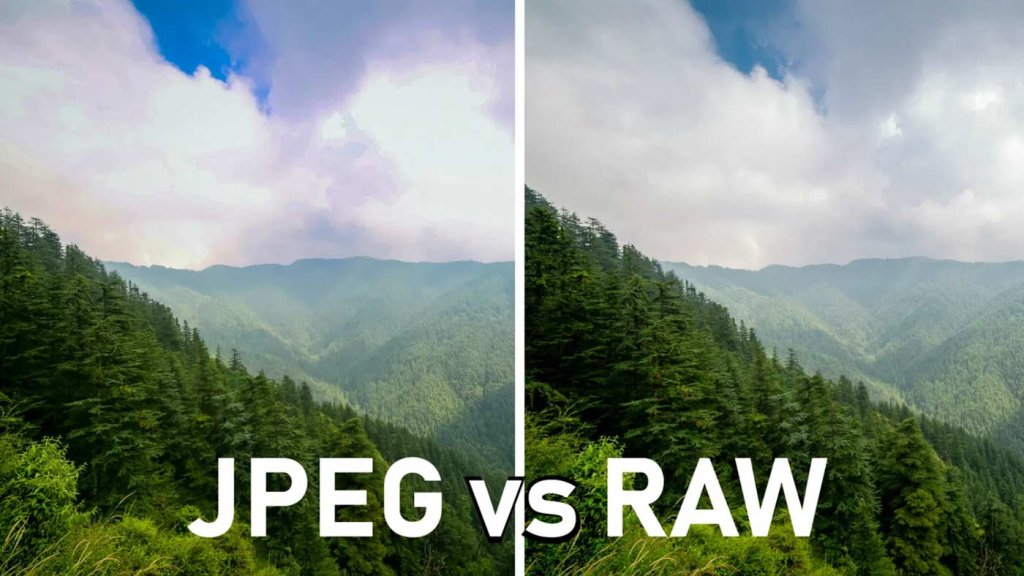
For every image that your drone camera takes, the information needs to be stored somewhere. This information includes colors, highlights, shadows, etc. That’s where the image file format comes into play. There are two types of file formats in drone cameras. One is RAW, and the other is JPG. The RAW file format lets you tailor the image according to your taste after clicking it with the help of the information stored. However the JPG file format doesn’t allow you to make changes to your images. This is because it is a fully compressed and processed file format that stores less information about the image than a RAW file format.
If you like clicking your pictures and sharing them immediately, then JPG format is a good option. But if you want to customize your images, then a RAW file format is the best option.
Plus, pictures taken in this format are of extremely high quality as compared to JPG and have larger image sizes as well. For these reasons, many photographers are recommended to use RAW image format for their drone camera. It gives one the liberty to tweak the look of the image as per one’s need or wish.
4. White Balance

The purpose of every photo is to look as close to the real image as possible while appearing more cinematic and stunning at the same time. To achieve this, white balance is an essential drone camera setting. White balance helps you get the colors of the image right, making them as true to the real one as possible. At the same time, it lets you add a touch of warmth or coldness for an artistic feel.
There are two ranges of white balance: one is orange, and the other is blue. Orange gives the image a warmer feel, while blue gives it an icy cold touch. You can adjust the range from extreme orange to blue and between them to get the desired colors in your photo. Drone cameras have some white balance options for you to choose like Cloudy, which gives your photos a slightly warm under-the-cloud feel, or Direct Sunlight, which gives you neutral colors under bright sunlight.
There’s also an Auto option that adjusts the colors to make them as close to natural as possible. For beginners, it is recommended to start using the available white balance options to click your natural and artistic photos. When you gain enough experience with white balance and how it makes your pictures look, you can start manually setting it up.
5. Different Photo Modes
There are different photo modes to play with that come with your drone camera. Some of the most common photo modes that you get are as follows.
- Single Shot: This mode allows you to take the perfect picture in one shot. You have to read the image with appropriate settings and use this mode to click a clear image in a single shot.
- AEB: Auto Exposure Bracketing helps you take multiple shots with different exposure values in one go. This mode is helpful when you are confused about the right amount of exposure for your photo.
- Timer: With this mode, you can easily capture individual or group photos by setting a variable timer.
- Burst: If you want to take different-angle shots of your subject, Burst mode will help you capture them. It takes multiple photos of a single subject in one click, thus giving you choices and letting you pick the best one out of them.
Picture Perfect Ending
We hope this guide helps you understand the basic but important drone camera settings for beginners. A drone camera gives you endless possibilities for taking shots and covering areas that you cannot do on foot.
With the right settings, you can capture your subjects and views from a wider view with a drone camera. Don’t give up if you can’t get it right in the first go. It will take time to get used to it and master the art of photographing with a drone camera. Just keep going, and don’t lose heart.
You will learn the skill and click beautiful pictures with your drone camera one day. Until then, keep learning and keep reading helpful guides.
Leave a Reply